
 02-25-2013, 04:08 PM
|
#1 | ||
|
Hall Of Famer
Join Date: Dec 2001
Location: Catonsville, MD
|
The BattleTech Dynasty, Chapt 6.5, Of Dogs and Cats
Chapter 6.5 Of Dogs and Cats
I feel like a little bit of BattleTech. Normally I hit this dynasty up roughly every year or so, but the purchase and enjoyment of a recent sourcebook has ignited that spark for a bit. I doubt this will last as long as my other chapters, which takes weeks. So instead I want to focus on one aspect of Chapter 7. Instead of doing this then, instead I am moving Operation Bulldog to Chapter 6.5. This is an official continuation of the plotline. Since this is happening far away from the rest of the dynasty, and it is one self-contained campaign, the goal here is merely to deal with this campaign and then move back. It will not be updating various events in the Celestial Coalition, or with anything else in the Kilts and Commandos mercenary unit. This just includes the forces involved in Operation Bulldog and the surrounding campaigns. When it is over, we will calculate all of the battle stuff, and then finish this mini-chapter.
__________________
Check out my two current weekly Magic columns! https://www.coolstuffinc.com/a/?action=search&page=1&author[]=Abe%20Sargent |
||

|

|
|
02-25-2013, 04:09 PM
|
#2 |
|
Hall Of Famer
Join Date: Dec 2001
Location: Catonsville, MD
|
At the beginning of Chapter 6 is a lot of stuff about the characters, their bios, and a lot more. You can also find links to all of the other chapters.
Chapter 6 - The BattleTech Dynasty, Chapt 6 The Opportunity of Chaos (3057-58) - Chapter Complete - Front Office Football Central
__________________
Check out my two current weekly Magic columns! https://www.coolstuffinc.com/a/?action=search&page=1&author[]=Abe%20Sargent |
|
|
|
|
02-25-2013, 04:11 PM
|
#3 |
|
Hall Of Famer
Join Date: Dec 2001
Location: Catonsville, MD
|
For Operation Bulldog, we will be using the following scenario pack:
__________________
Check out my two current weekly Magic columns! https://www.coolstuffinc.com/a/?action=search&page=1&author[]=Abe%20Sargent |
|
|
|
|
02-25-2013, 04:28 PM
|
#4 |
|
Hall Of Famer
Join Date: Dec 2001
Location: Catonsville, MD
|
What is this again?
Let’s do a quick review! The year is 3059. Duke Braham Essex founded and built a mercenary force from a small ragtag group into one of the largest and most respected units in the Inner Sphere. In the last two years, he has forced an alliance of planets left behind in the wake of huge wars between the major houses. A new Star League has been formed to fight the invading clans, and with it, a new Star Lord – Sun-Tzu Liao. As part of the war against the clans, the Star League has decided to destroy a clan. They have targeted Smoke Jaguar. They have divided up into two major military operations. The first is Operation Bulldog, a pan-state coalition of forces designed to smash the Smoke Jaguar forces in the Inner Sphere. The other is Taskforce Serpent, a large flotilla of naval assets with many troops moving towards the Smoke Jaguar homeworld and intent on destroying their assets there as well. Due to our own high success record against several different clans, we have been hired to assist with Operation Bulldog, under the auspices of Victor Ian Steiner-Davion and Anastasius Focht.
__________________
Check out my two current weekly Magic columns! https://www.coolstuffinc.com/a/?action=search&page=1&author[]=Abe%20Sargent |
|
|
|
|
02-25-2013, 09:08 PM
|
#5 |
|
Hall Of Famer
Join Date: Dec 2001
Location: Catonsville, MD
|
Heading this up are the following military assets of Kilts and Commandos:
Delta Regiment: Col. Conner Ward Bandit Battalion: Capt. Andrey Vihorev Bandit Company – Operation: Bulldog Iron Company - Operation: Bulldog Kevlar Company – Operation: Bulldog Flame Battalion: Capt. Johan Kreidler, of Blaze Company Pyre Company – Operation: Bulldog Blaze Company – Operation: Bulldog Ember Company – Operation: Bulldog Armor Battalion: Capt. Jassa Ramgarhia, of Aegis Company Aegis Company - Operation: Bulldog Shield Company – Operation: Bulldog Chainmail Company - Operation: Bulldog Weston Company - Operation: Bulldog Utopia Company - Operation: Bulldog This gives us 11 companies of mechs in Delta Regiment. Col. Conner Ward who is leading it, and is elated, as an ex-Jade Falcon MechWarrior. He is happy to smash a Clan that is a rival to the Jade Falcons.
__________________
Check out my two current weekly Magic columns! https://www.coolstuffinc.com/a/?action=search&page=1&author[]=Abe%20Sargent |
|
|
|
|
02-26-2013, 08:33 AM
|
#6 |
|
Hall Of Famer
Join Date: Dec 2001
Location: Catonsville, MD
|
Operation Bulldog:
The units in OB spend some time gathering, training, having their COs get to know each other, and drawing up battle plans. K&C has been so successful against the clans because they have always used batchalls and honor. They have never cheated the system that the clans use for fighting. Because the rest of the IS does not use it as much, we have requested permission to head up our own attack against a planet, so that we can fight our way. Due to our success, we are granted that permission. May 13, 3059 - After preparing, a preamble military operation begins, Operation Bird Dog. Small, well armed companies of mechs are launched simultaneously on nine Jaguar worlds. The goal is to tie up supplies, spread out defenders, and gain useful intel for the follow up strikes. Operation Bird Dog would turn out to be a huge success for Bulldog. The First Wave of Operation Bulldog aims to “capture” all of the worlds held by Clan Nova Cat in small Trials of Possession. Nova Cat will lose, and then the worlds and people will go over to the Star League officially. This will hopefully surprise the Smoke Jaguars and remove any chance of clan support. Remaining Wave One targets are only at a few Smoke Jaguar worlds –Hyner, Kiamba, Tarazed, Port Arthur, and Asgard were the only Jaguar targets. We are not planned on being in the first wave. We are deemed too important for the Trials on the Cat worlds, and the first battles are expected to be huge crucibles, with many large foes being involved. For example, on Asgard, the Star League forces outnumber Jaguars 4:1.
__________________
Check out my two current weekly Magic columns! https://www.coolstuffinc.com/a/?action=search&page=1&author[]=Abe%20Sargent |
|
|
|
|
02-26-2013, 09:11 AM
|
#7 |
|
Hall Of Famer
Join Date: Dec 2001
Location: Catonsville, MD
|
May 20, 3059 –
Operation Bulldog begins as forces leap into their 5 targeted systems Hyner falls in three days from the assault targeted it. Port Arthur was originally being lost by the Star League until three regiments from the Draconic Combine arrived and finished things. On both Asgard and Kiamba, the Jaguars were too late in realizing the danger, and fell quickly. However, Tarazed was different. They agreed with Kai Allard-Liao’s batchall and chose the mountains for battle. But due to the size of the forces arrayed against them, they were defeated in five days. Within a week, all five worlds fell, and the First Wave was complete.
__________________
Check out my two current weekly Magic columns! https://www.coolstuffinc.com/a/?action=search&page=1&author[]=Abe%20Sargent |
|
|
|
|
02-26-2013, 10:14 AM
|
#8 |
|
Hall Of Famer
Join Date: Dec 2001
Location: Catonsville, MD
|
Spending the next few weeks moving forces and consolidating holds, the Second Wave would begin on the 26 of June. Due to the success of the First Wave, Victor added three additional Jaguar worlds to the targets for the Second Wave, bringing the total to 11 targeted worlds.
The 11 targeted worlds included Turtle Bay, Almunge, Virentofta, Nykvarn, Hanover, Luzerne, Byesville, Labrea, Caripare, Avon, and Yamarovka. Additionally, more Nova Cat worlds were targeted to be “captured” Most worlds have been assigned multiple units, and we are the only unit in Operation Bulldog to have a target all to ourselves. We are given one of the smallest, least important planets in Wave Two to assault and capture. We have been assigned the assault of Nykvarn. The only defending unit on planet is the 124th Garrison Cluster, one of the weaker units the Jaguars have. A Ryuken unit of the DCMS will jump into system with us, and be available in case we need it. The other attacks go thusly: Turtle Bay and Almunge are undefeaded and taken back easily Avon and Caripare are assaulted by join Nova Cat and Star League forces, and the defenders quickly retreat sensing the unity between them to report this development. Labrea was captured is a large battle involved Clan Wolf-in-Exile vs the Jaguars, and Khan Phelan Kell bringing in a Cluster of mechs and Warriors for the Wolves. Byesville and Hanover had smaller engagements, but the defenders would leave soon after observing how overwhelmed the troops were. Luzerne would become a crucible of the Wave, with each force tossing in more troops. Virentofka, and Yamarovka met massive resistance, and the Jaguars never fled, and died on the planet, utterly destroyed.
__________________
Check out my two current weekly Magic columns! https://www.coolstuffinc.com/a/?action=search&page=1&author[]=Abe%20Sargent |
|
|
|
|
02-26-2013, 12:17 PM
|
#9 |
|
Hall Of Famer
Join Date: Dec 2001
Location: Catonsville, MD
|
The Nykvarn Campaign
June 27 – Our forces arrive at the planet and Conner Ward announces their presence. He reminds the Jaguars not only that he knows these laws inside and out, but also that the K&C have never violated the rules of honor on the battlefield. They bid their entire Cluster for defense of Nykvarn and will fight in large farming areas outside of any major civilization centers. They have set up a large grid for fighting. Any mech that moves outside of it is disqualified and considered killed. As part of the batchall process, we receive a full list of the defenders and their units. This Cluster has five binaries of mechs, all second line stuff. Each binary has two stars of mechs, and each star has 5 mechs. That’s 50 total mechs. Because the group is a garrison unit, they have older disgraced mechwarriors, some trueborn warriors, and those of lesser skill. They are regular for clan, which means they are the equivalent of veteran for Inner Sphere. They have no elementals or armor. They will allow us to land unmolested by any AeroSpace units. Our 11 companies of mechs all land in the farming areas. Any locals have long sensed moved away in the preceding hours, and there is no chance of stray shots that will kill anyone. In order to respect the Clan honor system, instead of pressing forward with our numbers, we will engage differently. Therefore, each of our companies will face one of their binaries. If we retreat or lose, we can then move another company in to face it. If they are destroyed, then another binary will move in to face us. They will fight until completed destroyed – they seek a blaze of glory and one final battle. These garrison units are pleased to lose in the service of their clan. We will be facing the battle now.
__________________
Check out my two current weekly Magic columns! https://www.coolstuffinc.com/a/?action=search&page=1&author[]=Abe%20Sargent |
|
|
|
|
02-26-2013, 12:37 PM
|
#10 |
|
Hall Of Famer
Join Date: Dec 2001
Location: Catonsville, MD
|
CO Ward orders in Chainmail Company. As a reminder this is our company:
ATA-2C Attila CRK-5003-2 Katana GAL-1GLS Gallowglas Mad Cat S CP-10-Q Cyclops Warhammer Iic CPLT-C1 Catapult RFL-5M Rifleman STY-3C Starslayer QKD-5M Quickdraw CMT-1 Comet DRT-4S Dart They have, arrayed against us: Locust IIc Warhammer IIc-2 Griffin IIc Behemoth Vixen Guillotine IIc Omnis Koshi B Shadow Cat A Vulture B Ryoken Prime All pilots are clan regulars. This is their Vixen, a lighter, 30 ton mech that has 1 large pulse laser, 4 machine guns, 2 ER mediums, and 5.5 tons of ferro-fib armor 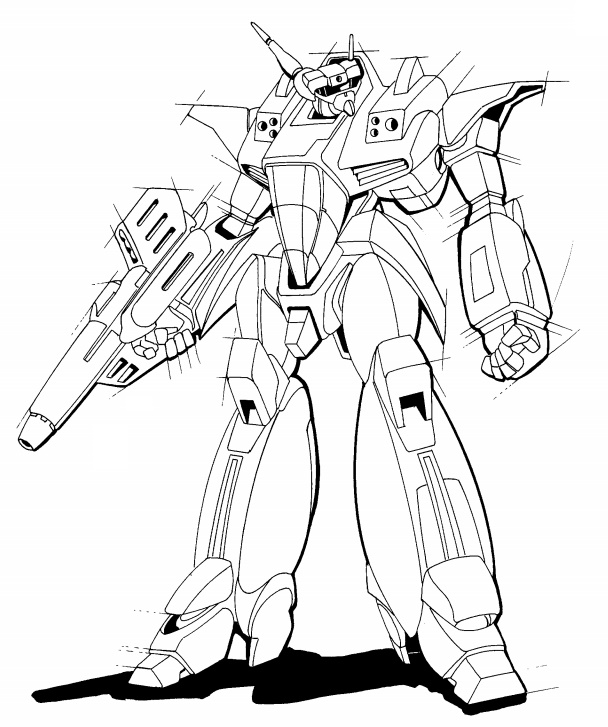 Their Warhammer IIc variant has 2 LRM15 launchers as well as ER PPCs.
__________________
Check out my two current weekly Magic columns! https://www.coolstuffinc.com/a/?action=search&page=1&author[]=Abe%20Sargent |
|
|
|
|
02-26-2013, 04:57 PM
|
#11 |
|
Hall Of Famer
Join Date: Dec 2001
Location: Catonsville, MD
|
We begin on the west and they on the east.
Turn 1 – We lose init. I move my Rifleman into one of the handful of woods in the area. I do the same with the Catapult and Cyclops. They move their Shadow Cat near the middle and I rush our Quickdraw to the same general area. I move my heavy metal mechs in behind the QD – Attila, Mad Cat, Warhammer IIc, etc. They maneuver their mechs to come down my flanks. Our Rifleman shoots at their Locust IIc which rushed in and destroys its LL and CT. Their Behemoth hits the engine once on our Rifleman in revenge. We focus some serious fire on their Vulture. Our Attila hits an engine once. The Gallowglas blows off the RA of their Vulture A large laser from our Starslayer destroys the RT. Our Mad Cat hits the lower left leg actuator on their Warhammer IIc-2. It falls but the Vulture remains standing. Our Attila kicks and destroys the LL of their Vulture And it falls. This triggers them using physical attacks, and they kick our Quickdraw and get a LL blown off through armor crit and its down. Turn 2 – We win init. We destroyed their Locust, and savaged their Vulture, but we have a Quickdraw down on the ground missing a leg and an internal Rifleman. Their Vulture remains prone. I keep the Cat and Cyclops where they are. I have to do the same with my Rifleman, there is nowhere to run. My QD fails to stand. I rush our Attila next to their Griffin IIc, followed by our Gallowglas. It hopped 6, so it thought it was safe…. Their Warhammer IIc-2 rises and our Mad Dog bases it. Our Starslayer destroys the LT on their Warhammer IIc. Our Cyclops hits the engine on their Vulture downed, and it’s engine explodes and it goes boom! Nothing survives save the blown off RA already. Our Mad Cat hits the LRM 15 ammo on their Warhammer IIc-2’s RT section and it blowsup. The pilot blacks out, it falls and destroys is CT section. We double kick the Griffin and hit twice but it is still standing. Turn 3 – We lose init. I again keep my long range mechs in what passes for cover here. They move several mechs by my downed QD. Our Comet and Dart flank them now that the Warhammer IIc-2 guarding it is down. I leap my wounded Attila next to my downed QD to defend it. I rush in more mechs behind the Dart and Comet, like our Mad Cat and Warhammer IIc. I get my Gallowglas and Mad Cat into their Behemoth rear arc but I’m not sure I want to take pot shots at it. We’ll see. They hop their Shadow Cat into the rear of my Mad Cat. Their Vixen destroys the RA of my QD. An ER Large Laser gets a glancing blow on our Mad Cat’s H from their Shadow Cat. Close! Our Attila hits the LRM ammo on their Griffin. Boom goes the LT. More fire destroys the CT and that mech is down. Our Gallowglas destroys the RA and RT of their Shadow Cat. Our Starslayer follows that by destroying its RL. It falls hard. Turn 4 – We lose init. I run my Gallowglas behind their line and encircle them. I order the Quickdraw pilot to eject. I run my Starslayer next to their Shadow Cat. I hop my Attila behind their Guillotine IIc. Our SS destroys the Ct on their Shadow Cat. Before it dies it uses its last attack on our Comet hits the Head goes critical and hits the life support twice. After softening it with the Attila, our Gallowgla’s long range weaponry destroy the right torso rear of their Guillotine IIc. Our Rifleman blows the RA off their Koshi and then destroys the RT. Both their Koshi and Guillotine IIc tumble. Kicks ensue by various folks Turn 5 – We win init. Their Koshi stands and moves. Their Gulliotine follows. I move my Attila by I again. Our Rifleman peppers the Koshi with a lot of damage but ultimately finishes off its H. A Gauss Slug from their Behemoth blows into the H of our Warhammer IIc, kills the pilot and finish off our mech. Our Attila blows up the Guillotine IIc’s CT. Our Warhammer IIc, before dying, destroyed the Gauss on their Behemoth, and blacked out its pilot. It falls to the ground quiet. Their Ryoken also tumbles. Kicks ensue. Turn 6 – We win init. Their Ryoken tries to stand, fails, and destroys its RL. Their Vixen gets behind our Catapult. We move around for good angles. I eject a badly damaged Mad Cat and Comet. Our Dart rushes up to their Behemoth. The Dart aims for its H, and hits twice, decapitating it. Missiles from our Cyclops and Cat hammer their Vixen. Our Katana destroys the LA and LL of their Ryoken and its down permanently. Just the Vixen is left. Turn 7 – We lose init. Their Vixen charges our injured Rifleman. We cut it down massively and nothing is left save its RT and H after the Cyclops blasted its CT.
__________________
Check out my two current weekly Magic columns! https://www.coolstuffinc.com/a/?action=search&page=1&author[]=Abe%20Sargent |
|
|
|
|
02-26-2013, 04:57 PM
|
#12 |
|
Hall Of Famer
Join Date: Dec 2001
Location: Catonsville, MD
|
Salvage and Repairs
Locust IIc Rl, RT, LT, LA, RA, H Vulture RA Warhammer IIc-2 LA, RA, H, RL, LL Griffin IIc LA, RT, RA, Rl, LL, H Shadow Cat LL, LT, LA, H Guillotine IIc RA, LT, LA, LL, RL, H Koshi missing RT, H Ryoken missing RL, LL, LA Behemoth missing H Vixen H, RT Quickdraw LL, missing RA Warhammer IIc missing H, dead pilot
__________________
Check out my two current weekly Magic columns! https://www.coolstuffinc.com/a/?action=search&page=1&author[]=Abe%20Sargent |
|
|
|
|
02-26-2013, 05:13 PM
|
#13 |
|
College Prospect
Join Date: Apr 2002
Location: Whitman, MA
|
Too bad on the pilot but still still a good result for the cause.
Nice to see you back to this, even if just for this one operation. Tell
__________________
FOOL - Ann Arbor Winged Lingerines FOOLX - Portland Axemen Hattrick - Fizzle United (222968) |
|
|
|
|
02-26-2013, 05:19 PM
|
#14 |
|
Hall Of Famer
Join Date: Dec 2001
Location: Catonsville, MD
|
I'd be shocked if we don't see more deaths before this is all through
__________________
Check out my two current weekly Magic columns! https://www.coolstuffinc.com/a/?action=search&page=1&author[]=Abe%20Sargent |
|
|
|
|
02-26-2013, 05:38 PM
|
#15 |
|
Hall Of Famer
Join Date: Dec 2001
Location: Catonsville, MD
|
After defeating the first Binary, the garrison moves up their next ten mechs and Conner Ward sees that this is likely their strongest company, considering the mechs and people there. He dispatches Ember Company to break into them.
Ember ATA-2C Attila CGR-1A5 Charger GAL-1GLS Gallowglas ON1-K Orion APL-1M Apollo Masakari C Vulture C TBT-7A Trebuchet QKD-5K Quickdraw STY-3C Starslayer SDR-5V Spider DRT-4S Dart Our foes: Peregrine-2x2 Hunchback IIc Griffin IIc Highlander Iic Omnis Daishi Prime Cougar A Cauldron-Born A Ryoken Prime Vulture C The Daishi pilot is clan elite, and the Cauldron Born is clan vet. This is their Cauldron-Born, an omnimech sporting an Ultra AC20, 2 ER Large Lasers, 3 ER ML, 2 Medium Pulses, 2 MGs on its 65 ton frame. 5/8 movement. 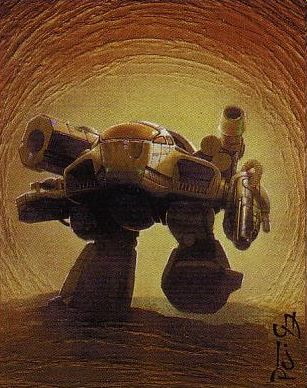 You’ll notice that we have a lot of similar mechs from Chainmail Company to Ember Company.
__________________
Check out my two current weekly Magic columns! https://www.coolstuffinc.com/a/?action=search&page=1&author[]=Abe%20Sargent |
|
|
|
|
02-26-2013, 10:41 PM
|
#16 |
|
Hall Of Famer
Join Date: Dec 2001
Location: Catonsville, MD
|
Turn 1 – I set up simiarlly to last time and lose init. This time, my Apollo and Trebuchet are in the places my Rifleman and Cat were. I base our Quickdraw to their Vulture and move in my Spider in the middle of the bru-ha-ha. Their Grif tries to flank my Apollo. I spread my fire out and take attacks of opportunity. I try to hit their Daishi as much as possible. Our Attila nails the engine on a Peregrine. Our QD took more than 80 damage but is still standing. It’s hex is now on fire. A few kicks follow.
Turn 2 – We lose init. I hope our Spider next to their Daishi and behind their Vulture. Our Orion bases the wounded Peregrine. I also hop the savaged QD next to their Vulture. We close massively on one side and there will be a lot of cannon fire now. Our Vulture C’sgauss hits the H of their Vulture C and it dies. Their non-wounded Peregrine destroys the RA of our QD. Their Highlander IIc takes 80+ damage and falls. We were unable to keep concentrating fire on their Daishi by most of my mechs after smoke moved to block LOS. Our Gallowglas took more than 80 damage. Our Orion falls after missing a kick on their wounded Peregrine and being kicked by it too. Turn 3 - We lose init. Smoke spreads. I run my Vulture out of hiding and move my Starslayer in. Our Orion stands and moves into an adjacent woods hex. Their Highlander stands and moves. I leap that massively wounded QD next to their Ryoken. Our Spider lands next to their wounded Peregrine. My Attila manages to rush behind their Cauldron-Born and right by the Highlander IIc and Hunchback Iic to get there. Risky, I know. Dart runs next to their Cougar, which I damaged a bit last turn. Our Attila blasts the Ultra AC20 ammo in their Caldron Born after going internal from the rear arc. He then follows by blasting the CCT rear and destroying it. Dead mech. They destroy the LA and hit the engine three times on our Gallowglas and it is destroyed. Their Daishi hits an ER PPC on our Attila. Our Gallowglas blows off the RA of their Highlander. Our Trebiuchet hits the H once on their Daishi. After taking more than 100 damage, our Attila falls. Their Highlander IIc does as well. Minor physical attacks follow. Turn 4 – We lose init. Their good Peregrine moves by our Apollo and I jump our Trebuchet behind it. Their Highlander rises again. I walk my Dart 9 hexes back next to the Peregrine as well. We will protect our missile mech! I leap our Spider behind their Ryoken. I leap our Starslayer next to their Highlander and Huchy. Their Highlander rises again. My Charger moves behind their Griffin. Our Attila rises. Their Highlander destroys the LA of my Attila. Their Cougar destroys its LT. Our SS hits the hip on a leg of their High. Our Vulture’s gauss slugs nail the Daidhi and destroy the RT. This is enough engine hits t finish it. Our Masakari hits the gyro and destroys the LA of their Hunchback IIc. Our Orion nails the hip on their Cougar. Our Apollo hits the Cougar’s gyro once. It falls and destroys its RL. Their Hunchy falls too. Our Attila joisn them on the ground. Many kicks ensue. Our Dart kicks and destroys the LL of their Peregrine. Turn 5 – We lose init. They begin with 4 mechs on the ground. We eject the Attila pilot. I rush our Dart next ot the other Peregrine. Their Highlander IIcs tries to stand, fails and the pilot blacks out. I leap the QD next to a Peregrine too. Spider leaps behind it. Their Hunchy manages to stand. The Cougar can’t stand though, obviously. Their legged Peregrine can’t stand either. Their Cougar sheers off the head of our Masakari and it is down. Our Apollo blasts the RA into pieces on their Hunchy. Our Masakari destroys its LT and CT before it died. Their Hunch hits a gyro and engine once each on our Charger and it falls. Our Orion kicks and destroys the CT of their Cougar. Our Trebuchet destroys he RA and RT of their downed and legged Peregrine. Our Dart kicks and destroy s the LL on their other Peregrine and it falls hard. It hits its LRM 5 ammo and destroys its LT and the pilot blacks out. Turn 6 – We finally win init. Our Starslayer gets close ot their Ryoken. My Dart bases their Griffin. The Charger rises. Their Grif hits a hip on my Dart. Our Trebuchet blows the LA off a Peregrine and destroys the LT. Our QD aims for the head of the blacked out Peregrine and destroys it. Their Ryoken destroys the LA of my Spider. Our Vulture’s gauss slug slides into the CT of the damaged Peregrine and finishes it. Turn 7 – We lose init. Again. They have the Grif and Ryoken left, assuming the Highlander pilot does not wake up. Our Orion bases their Grif. Our Spider leaps behind it. Our Orion opens a leg up on the Grif and hits an actuator and it falls. We concentrate fire on the Ryoken to no major avail. Our Orion kicks and destroys the H of their Griffin. Turn 8 – We win init. We move toward their last mech. QD and SS each hit an engine on it. Spider destroys the RT of it. Vulture destroys LL. Dart destroys LT and its engine shuts down.
__________________
Check out my two current weekly Magic columns! https://www.coolstuffinc.com/a/?action=search&page=1&author[]=Abe%20Sargent |
|
|
|
|
02-26-2013, 10:44 PM
|
#17 |
|
Hall Of Famer
Join Date: Dec 2001
Location: Catonsville, MD
|
Salvage N Stuff
Vulture C missing H Cauldron Born missing CT and RT. Highlander IIc missing RT Daishi missing RT, enginex3 Hunchback IIc H, LL, RL, RT, LA Cougar, H, LL, LT, LA Peregrine LAx2, H, RL Peregrine missing H, LT Griffin IIc missing H Ryoken RA, H, RL, LT, LA Gallowglas missing RA, enginex3 Quickdraw missing RA Attila missing LA, LT Masakari, missing H, pilot dead Spider missing LA
__________________
Check out my two current weekly Magic columns! https://www.coolstuffinc.com/a/?action=search&page=1&author[]=Abe%20Sargent Last edited by Abe Sargent : 02-26-2013 at 10:44 PM. |
|
|
|
|
02-27-2013, 07:59 AM
|
#18 |
|
Hall Of Famer
Join Date: Dec 2001
Location: Catonsville, MD
|
Alright. This is a good shake down battle for Utopia Company, one of our newest ones.
Utopia Masakari B BLR-1GB BattleMaster CRB-27b Crab AX-1N Axman MR-5M Cerberus WHM-7M Warhammer CLPT-C1 Catapult Griffin Iic ALX-1KC Alexander CMT-1 Comet STG-3G Stinger BUM-1 Bumblebee Our foes in the third Binary Rifleman IIc Jenner IIc Shadow hawk IIc Galahad Goshawk Kraken Omnis Koshi A Masakari A Nobori-Nin Prime Grendel B This is their Koshi, an OmniMech that weighs 25 tons and is the Jaguars typical scout OmniMech 
__________________
Check out my two current weekly Magic columns! https://www.coolstuffinc.com/a/?action=search&page=1&author[]=Abe%20Sargent |
|
|
|
|
02-27-2013, 11:55 AM
|
#19 |
|
Hall Of Famer
Join Date: Dec 2001
Location: Catonsville, MD
|
We move to a new grasslands area by the farm.
Turn 1 – We lose init. Feels a lot like last match! We are colliding our forces very quickly in the open air. Expect a lot fo smashing quickly. My Axmen leaps behind their Galahad and finds a spot to camp. Then their Goshawk manages t oslip beside my Cerberus and I spin it to defend while basing it with my Warhammer. Both the AC20 and Large Pulse Laser slice into the Galahad’s LL and hit two foot actuators. Their Goshawk does the same on our Warhammer. Their Kraken hits a third actuator on it. Their Masakari follows with two engine hits and a gyro hit on it. It falls and destroys its LL. Their Galahad tumbles and nails a hip. Minor physical attacks ensue. Our Axman falls after being kicked. They kick the H of our Warhammer and black out the pilot. Pretty much an ideal turn for them on that mech. Turn 2 – We lose init. They set a hex on fire. Their Galahad fails to rise. I rise the Axeman and move ot a different spot. Stinger leaps behind their Grendel. Our Bumblebee tries to charge their Kraken which is next to the border for the battle. Knocking them out will be a violation and the mech will be automatically shut down by remote for the trial. We focused some fire on their Rifleman Iic last turn and Our griffin chases it a bit this time. Catapult behind their Goshawk. Our Masakari hits the engine once and two leg actuators on their Rifleman IIc. Their Grendel destroys the Warhammers CT. Their Phoenix hawk gets a LA blown off crit on our Axmen – it falls and the pilot blacks out. Our Bumblebee hits the Kraken, force sit off the board, and then gets its RL and RT blown up in the battle. Their Rifleman falls and blacks out. Turn 3 – We win init. We eject from the Bumblebee. Fire and smoke have spread. Their Galahad rises this turn. I charge my Griffin IIc into their Koshi which is adjacent to another figure adjacent to the edge. Maybe we can do this again. Ditto my stinger into their Grendel into something else. Their Jenner hit s the engine and AC20 on our Axman. Their Masakari destroys its LL. Their Grendel destroys the LA of our Stinger. Our Cerberus hits the gauss on their Galahad. Dead La and the pilot blacks out. Our Alexander peppers the Rifleman IIc with Medium lsaers and lances off its head after aiming at it. Stinger misses its charges. But the Nobori-Nin is forced from the field by our Griffin IIc and is counted as out. Our Axman awakened. Turn 4 – We lose init. I eject the Axman. I move my mechs down the left flank. Our Alexander bases their Goshawk. My Crab bases their Koshi. Our Comet hits the H of their Galahad three times with Small Lasers and kills the pilot. Our Cerberus gets a RA blown off crit on their Masakari. Our Masakari hits the other’s engine twice, gyro once and destroys the targeting computer on it. Our Battlemaster’s PPC smashes the LA of the Masakari after hitting ammo there and the pilot blacks out. It falls and destroys its CT. Our Alexander pushes the damaged Goshawk off the map. I’ll take my ko’s however. Our Cerberus kicks and destroys the LL of their Shadow Hawk IIc. Our Catapult falls after being kicked. Our Crab misses a kick and tumbles too. Turn 5 – We lose init. I stand the Cat. Followed by the Crab. Our Grif bases their Grendel. Our Masakari destroys the LA and LT of their Jenner. It also nails it sensors and life support in the head. Our BM hits and blows off LL of it. Our Cerberus destroys the other leg on their Shadow Hawk IIc. Their Grendel destroys the RL and RA of our Comet. Their Jenner and Grendel fall. Our Griffin IIc jkicks and destroys the CT of their Grendel. Turn 6 – We lose init. We move our stuff around. The Masakari dices a PPC into the Koshi;s CT and destroys it but only a few parts were left. We won. I thought we might lose for the first few turns, but we rallied well.
__________________
Check out my two current weekly Magic columns! https://www.coolstuffinc.com/a/?action=search&page=1&author[]=Abe%20Sargent |
|
|
|
|
02-27-2013, 11:55 AM
|
#20 |
|
Hall Of Famer
Join Date: Dec 2001
Location: Catonsville, MD
|
Salvage N Stuff
Nobori-Nin Prime Kraken Rifleman IIc missing H Galahad missing LA Masakari RA, RT, LT, H, LL, RL Goshawk Jenner IIc missing LA, LT Shadow Hawk IIc missing LL, RL Grendel RT, LT, RA, LA, H, LL, RL Koshi RT, RA, H Warhammer RL, Lt, LA, RT, RA, H Axman missing LL Bumbleee destroyed RL and RT Stinger missing LA Comet missing RL, RA
__________________
Check out my two current weekly Magic columns! https://www.coolstuffinc.com/a/?action=search&page=1&author[]=Abe%20Sargent |
|
|
|
|
02-27-2013, 06:51 PM
|
#21 |
|
Hall Of Famer
Join Date: Dec 2001
Location: Catonsville, MD
|
Okay, time for the 4th battle. We send out Blaze Company.
ATA-2C Attila WHM-7S Warhammer TDR-5S Thunderbolt DRG-5K Grand Dragon PPR-5S Salamander Supernova Galahad ARC-2R Archer FS9-S Firestarter WSP-3M Wasp PXH-1 Phoenix Hawk HER-2M Hermes II Our-y Jag-y foes-y: Marauder IIc Hunchback IIcx2 Commando IIc Wyvern Iic Corvis Peregrine-2 Omnis Hankyu Prime Shadow Cat Prime Kingfisher A This is their Corvis, a garrison and security mech typically used by Hell's Horses. It’s 40 tons rocks an Ultra AC10, 2 medium pulse lasers. 
__________________
Check out my two current weekly Magic columns! https://www.coolstuffinc.com/a/?action=search&page=1&author[]=Abe%20Sargent |
|
|
|
|
02-27-2013, 09:16 PM
|
#22 |
|
Hall Of Famer
Join Date: Dec 2001
Location: Catonsville, MD
|
We move to a different area again, due to the fire.
Turn 1 – We lose init – what a surprise. They run up their Commando IIC ot our Salamander’s exposed side, so I base it with our Attila. Firestarter leaps behind their Huncy. Their Marauder IIc nails the RL of our Firestaarter and destroys it. They focus their fire on our Warhammer and black out our pilot after a glancing shot to our head from their Peregrine. They also destroys its RA and LL. We manage to knock out their Commando IIc pilot and their mech tumbles hard after an ammo explosion destroyed its RA. A few kicks follow Turn 2 – We lose init. I eject the damaged Firestarter. PXH to the rear of their Peregrine. They are flanking my Salamander with two mechs. Wasp to rear of their Corvis. A Hunch destroys the CT of the Warhammer. Wasp RT destroyed by Corvis. We focus fire on their Kingfisher, it takes more than 100 damage and hits the ground rough. Our PXH misses a kick and falls. Turn 3 – We lose init. Wasp tries to charge their Corvis, now that we know that strategy works. After fialing once, the PXH manages to lift itself off the ground and moves. The Kingfisher doesn’t rise. I hop our Attila behind their Marauder IIc. We go overheat to unload on the Marauder but miss on a lot of 6s. Our TBolt destroys the RT of a Hunchback. Their Corvis hits the LL of our Wasp and blows it off. Missiles from our Salamander pepper the Kingfisher and black out the pilot. Our Supernova nails the H of their Corvis, goes internal and hits the cockpit, killing the pilot Turn 4 – Wonders never cease, we won init. I eject the Wasp. I get a Grand Dragon behind their Marauder IIc. They move their Hankyu next to my Archer and I move my Thunderbolt there to protest their presence. Our Salamander destroys the LA and LT of their hankyu. Our G Dragon’s LRM 10 destroys the LA of a Hunchback. Our Archer follows with a hip and a lower leg actuator. Our PXH ran up to their Kingfisher, blasts off the H. The badly wounded Hunch falls. Our Archer destroys the LL on their Hankyu with a punch to the leg. It falls and the pilot blacks out. The marauder is kicked by our Grand Dragon and falls too. Turn 5 – We lose init again. ER Large Lasers stab from our Supernova into their Wyvern IIc and destroy its RA. A gauss slug from the Galahad follows and destroys the ammo in the RT. Missiles from the Grand Dragon destroy the RT on the Hankyu and it shuts down due to engine failure. Our T Bolt destroys the CT of the downed Hunchy. Their Marauder IIc destroys the RL on our Attila. Our Salamander falls form damage. Their Wyvern does as well. T6 – We lose init. The last Hunch is out of AC 20 ammo and just has two lasers left – not a major threat. Our Salamander rises. Their Wyvern does. Our Galahad hit sthe LRM ammo in the Peregrine’s LT. The Grand Dragon follows with the CT and destroys it. Our Supernova hits the gauss on the Shadow Cat, it takes out the arm, and the pilot blacks out. Our Attila loses its LA to the Marauder Iic but the MAD falls. Hermes kicks and hits the hip on the RL of the Wyvern and it tumbles too. T7 – We lose init. I eject the Attila. Our G Dragon bases their Hunch. Their Wyvern manages to stand. Their MAD joins it. I base the Mad with the Supernova. Their Hunchback manages to get a limb blown off crit on our Salamander’s RL. Galahad destroys the LT of their Hunch. Our Hermies II finishes off the Wyvern’s CT. Our T Bolt falls from a barrage of their Mad and both their Mad and Hunch fall. Our Supernova kicks and hits the Mad’s gyro three times and it is down. The Grand Dragon kicks and destroys the CT on the Hunch. And we have finished them off.
__________________
Check out my two current weekly Magic columns! https://www.coolstuffinc.com/a/?action=search&page=1&author[]=Abe%20Sargent |
|
|
|
|
02-27-2013, 09:36 PM
|
#23 |
|
Hall Of Famer
Join Date: Dec 2001
Location: Catonsville, MD
|
Salvage N Stuff
Commando IIc missing RA Hunchback IIc H, RT, RA, LL, RL Corvis, cockpit hit Hankyu missing LL, LA, LT, RT Kingfisher missing H Peregrine H, RT, RA, LA, LL, RL Shadow Cat missing RA Hunchback IIc RT, RA, LA, LL, RL, H Wyvern IIc LT, RT, LL, RL, LA, LL, H Marauder IIc gyrox3 Firestarter missing RL Warhammer H, RT, LT, RL, LA Wasp missing RT, LL Attila missing RL, LA
__________________
Check out my two current weekly Magic columns! https://www.coolstuffinc.com/a/?action=search&page=1&author[]=Abe%20Sargent |
|
|
|
|
02-27-2013, 11:19 PM
|
#24 |
|
Hall Of Famer
Join Date: Dec 2001
Location: Catonsville, MD
|
We have one final battle remaining.
We dispatch Kevlar Company: Behemoth Phoenix Hawk Iic THR-1L Thunder KTO-19 Kintaro AWS-9M Awesome WHM-7A Warhammer TBT-7M Trebuchet EXC-B2 Excalibur ALX-1kc Alexander SNT-04 Sentry PXH-3M Phoenix Hawk BUM-1 Bumblebee And the Jags we are facing. Behemoth Locust Iic Clint IIc Orion IIc Hellhound Vixen Omnis Masakari Prime Cougar A Vulture Prime Grendel Prime This is their Clint Iic. It’s one of many Clan versions of old Inner Sphere designs. It has an LB 10 X and 2 ER medium lasers on its 40 ton frame. 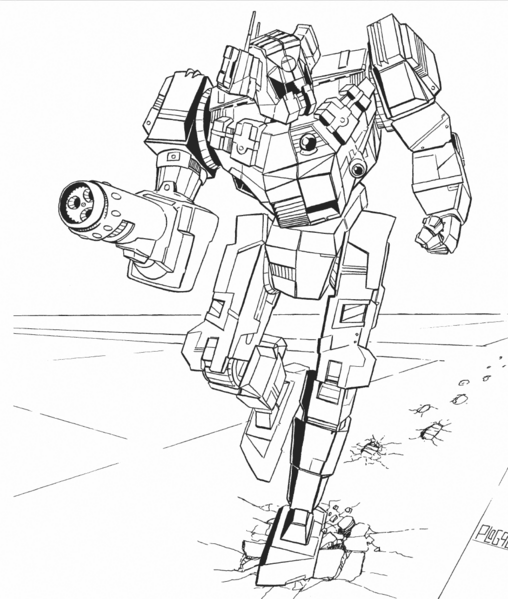
__________________
Check out my two current weekly Magic columns! https://www.coolstuffinc.com/a/?action=search&page=1&author[]=Abe%20Sargent |
|
|
|
|
02-28-2013, 09:45 PM
|
#25 |
|
Hall Of Famer
Join Date: Dec 2001
Location: Catonsville, MD
|
We are on a few farm. Last battle, alons-y!
Turn 1 – We lose init. I move my forces down the middle, but with the Trebuchet and Excalibur in good sniping posts. They charge back. Their Locust manages to slip past our line and close with our Kintaro. We exchange fire, concentrating much on their Behemoth. A bit of missile fire from their Vulture gets a trough armor critical on the Thunder, hits the ammo, and the CASE forces the mech to lose its LT, and that shuts it down – XL engine. We sandblast the Behemoth and it takes 80 damage but remain standing. They damaged our Phoenix Hawk Iic as well. Minor attacks follow. Turn 2 – We win init this time. Whoo hoo! The clanners move about. They pull back their central thrust and pull in flanks to expose us. Clever. They fire at the two mechs in the middle. They blast our Kintaro and destroy its LA and LL and hit two actuators on the RL. They also manage to deal 60 damage to our Awesome but it stands. We hit the gyro once and engine once on their Behemoth, but it remains standing. It’s critical in three places. Our Kintaro does something rare when it falls. It hits the RL and nails the other two actuators, thus freezing the leg, and now it is as immobile as if both legs were destroyed, thus it is out of the battle. Then they do something interesting. Their Cougar pushes our Warhammer of the edge of the map. They are doing what we did. It’s out of bounds and turned off. Turn 3 – We are down three mechs and they aren’t down any. We have lost two heavies and a medium, and that’s not insignificant losses I order our light mechs to move in dangerously to order to give our heavier assets some breathing room. We won init again too. Their Behemoth is obscured by smoke from a fire set in its hex and it is not moving to try and slip. It’s hard for us to see it, I have to fire elsewhere. Luckily for us, a gauss from our Behemoth clocks the H of their Vulture and drops it. Unluckily for us, their largely concentrated fire manages to pierce the Phoenix hawk’s armor and destroys its RT. It falls hard. A kick by their Locust destroys its LL. Turn 4 – We win init. I eject the PXH. We move in more. We have regained LOS on their Behemoth from new angles. With our new angles, missiles from our Trebuchet smash its CT twice and hit an engine and gyro each once and shut it down. Meanwhile, they blast our Awesome and stagger it. It falls under 80 points of damage. We punch and smash the H of their Vixen with our Bumbleblee but it just dazes them, nothing internal. Turn 5 – We lose init. They push forward with few loses. I stand the AwesomeWe target opportunity. We shatter the LL of their Vixen and an SRM missile hits the head, rings the bell of their pilot, and that person blacks out when it falls and they take damage from the fall. Meanwhile, they manage to do less damage this time, just continuing many attacks on the Awesome. It is now internal in 5 places. Turn 6 – We lose init. They push forward more. Their Orion IIc Blasts the Awesome and it loses both arms in that exchange. We miss a lot, but we do manage to destroy the RT on their Clint IIc. They kick and leg our Sentry with a Masakari after it moved in. I call it. They owned us. We took out three of their mechs but lost a lot.
__________________
Check out my two current weekly Magic columns! https://www.coolstuffinc.com/a/?action=search&page=1&author[]=Abe%20Sargent |
|
|
|
|
02-28-2013, 09:46 PM
|
#26 |
|
Hall Of Famer
Join Date: Dec 2001
Location: Catonsville, MD
|
Salvage N Stuff
Vulture Prime missing H Behemoth gyrox2, enginex1 Vixen missing LL Clint IIc missing RT Awesome missing RA, LA Thunder missing LT. Kintaro missing LL and LA – damaged RL Phoenix Hawk missing RT, LL Sentry missing RL We give them an hour to fix armor and weapons. They even manage to replace the Leg on their Vixen. But the rest is unable to be fixed.
__________________
Check out my two current weekly Magic columns! https://www.coolstuffinc.com/a/?action=search&page=1&author[]=Abe%20Sargent |
|
|
|
|
02-28-2013, 10:20 PM
|
#27 |
|
Hall Of Famer
Join Date: Dec 2001
Location: Catonsville, MD
|
We sent out Weston Company to give them a chance to see what they have in this shakedown mission.
KGC-000 King Crab TDR-5S Thunderbolt CGR-1A5 Charger AX-1N Axman Loki A CTF-3L Cataphract CLPT-C1 Catapult EXC-B2 Excalibur ALX-1KC Alexander SDR-5V Spider SNT-04 Sentry BUM-1 Bumblebee This is our King Crab, and old mech from the Star League Era clocking itn at 100 tons. It’s main claim to fame is the double AC20s it roars with on the battlefield. 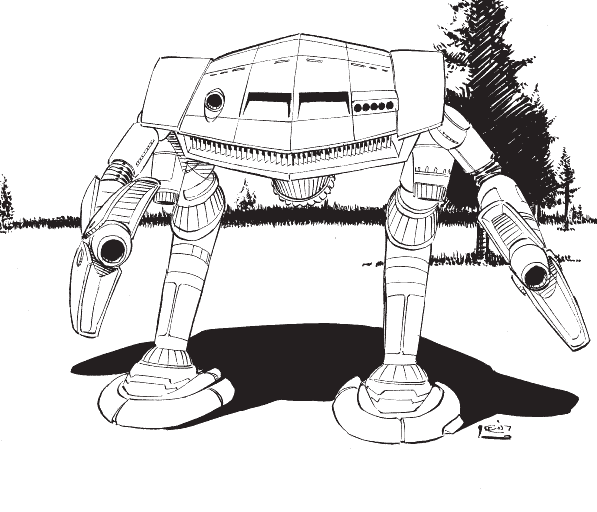 Battle begins.
__________________
Check out my two current weekly Magic columns! https://www.coolstuffinc.com/a/?action=search&page=1&author[]=Abe%20Sargent |
|
|
|
|
03-01-2013, 09:50 AM
|
#28 |
|
Hall Of Famer
Join Date: Dec 2001
Location: Catonsville, MD
|
Turn 1 – We win init. I establish defenses around my long range mechs and don’t move out and force them to come in – different tactics than before. They slide in. I want to drop their numbers quickly. The first time, we spent way too long on their Behemoth and fell behind the eight ball because of how long it took. This time, we are taking out one mech, guaranteed. Our target is the Hellhound, a solid medium mech. We destroy its LA, RL, and RT and it falls to the ground hard. We also have to hit their Locust with my Alexander, and we hit a few times to stab some energy into it.
Turn 2 – We win init and I again force them to rush at me. Thy close within medium range of our King Crab’s AC20s. We attack them. They blast the Cataphract heavily. It loses its LT and shuts down (XL engine). Meanwhile, our Alexander continues to pace their Locust and blasts its RL clean off and it falls. While that happens, we move most of our fire to their Clint IIc, finish it (nothing left save both legs and a H) and drop a bit more weapons onto their Hellhound, taking out its LL and it’s out of the fight. We kick the Locust IIc and damage it some more. Turn 3 – We lose init. We push out into the hole made by the dead or dropping mechs. They move around us, slipping mechs to our fire support team. They get ,lucky again. A headshot to the Axman by their Orion IIc hit the cockpit and slays the mechwarrior. Meanwhile, we savage their Cougar and destroy both the RT, LT and RA thus shutting down the engine. We also dice the Locust IIc with our Alexander and finish it off by smashing the other Leg and the RA too. Turn 4 – We lose init and move our mechs around their remaining forces. Their Vixen manages to slip out of the circle. We concentrate fire on their Orion IIc and destroys its CT section and LL, RA. Meanwhile, they spread their damage out, hitting several of our mechs and doing little damage. No major physical attacks follow Turn 5 – We win init. I keep our positions. We base their Vixen with a Spider and Sentry. The Alexander jumps behind their Masakari. They Destroy the LA on our Charger. It falls from taking 80 damage. Meanwhile, we focus fire on the Grendel and it goes down after losing both arms and one leg. Our Spider misses a kick and falls. Turn 6 – We lose init. I eject the Charger. We get a few scouts by their Grendel. Meanwhile, we move to the Masakari. We focus fire on the Masakari. All that happens is that we hit a PPC on the RA by our Loki. Meanwhile, our Sentry finishes off the downed Grendel after destroy its RT and LT. Turn 7 – We lose init. They have left just a damaged Masakari and a Vixen. We make few moves. We focus fire and go overheat to alpha strike with a few mechs. We blaze and destroy the LL and LT of their Vixen. The Masakari takes damage, loses both arms, and falls. We kick it and destroys the H with our Thunderbolt. The Vixen pilot blacks out when it falls and that is it. We have finished the last group of clanners on the planet.
__________________
Check out my two current weekly Magic columns! https://www.coolstuffinc.com/a/?action=search&page=1&author[]=Abe%20Sargent |
|
|
|
|
03-01-2013, 09:51 AM
|
#29 |
|
Hall Of Famer
Join Date: Dec 2001
Location: Catonsville, MD
|
Salvage N Stuff
Hellhound missing LA, RL, RT, LL Locust Iic missing RA, RL Clint IIc H, LL, RL, RA Cougar A missing RT, LT, LA Orion IIc RT, H, LT, LA, RL Grendel missing LA, RA, RL, RT, LT Vixen missing LL, LT Masakari missing H, LA, RA Charger missing LA Axman cockpit hit, dead MW Cataphract missing LT
__________________
Check out my two current weekly Magic columns! https://www.coolstuffinc.com/a/?action=search&page=1&author[]=Abe%20Sargent |
|
|
|
|
03-01-2013, 11:38 AM
|
#30 |
|
Hall Of Famer
Join Date: Dec 2001
Location: Catonsville, MD
|
We take a large number of the MechWarriors as bondsman, as well as some techs and such.
The aerospace assets were not a part of the deal – we fought for the planet and they are around it. Their assets leave and head back to Jaguars territory. We spend the next little bit fixing things, gathering tech, consoling the planet and more. The sheer amount of clan salvage we got is not unusual for the Operation. The clan salvage from the Operation is huge and really infiltrates the Inner Sphere. A number of ex-Smoke Jaguars will be found in various militaries for a while. We’ll look at materiel and men later. Meanwhile, we prepare for a potential counter attack here on Nykvarn , deep into Jaguar territory – we are the furthest out from Wolcott, which we used as a jumping ground. In fact, we are on the Ghost Bear border. End of Wave Two
__________________
Check out my two current weekly Magic columns! https://www.coolstuffinc.com/a/?action=search&page=1&author[]=Abe%20Sargent |
|
|
|
|
03-01-2013, 12:46 PM
|
#31 |
|
Hall Of Famer
Join Date: Dec 2001
Location: Catonsville, MD
|
On July 27, Smoke Jaguar counterattacks begin. They are targeting Inner Sphere worlds that were used as bases for the attack. It’s not a good plan. The forces for the third wave are already in position and supplied. It might push back other waves but not terribly so. They are not concerned with retaking key worlds. They also tend to be under-armed for their various battles.
The counter-attack is aimed at a few keys. Five targeted worlds in the Combine were attacked – Mcalister, Lonaconing, Matamoras, Meinacos, and Pesht. The desperate attack on the vital world of Pesht would be easily repulsed by the large numbers of troops there. McAlister was initially successful for the Jaguars, and they destroyed several bases and supplies, but were ultimately forced back off. On both Matamoras and Meinacos, very strong and desperate Jaguar attacks pushed back the defenders and gained ground. After success, reinforcements from nearby systems arrived and defeat both Jaguar counter thrusts. Lonaconing was in the worst position, far out on the flank. Expecting heavy losses, the local defenses managed to strengthen and push against a hesitant Jaguar and finish them off planet. On August 13, all forces have left the 5 worlds targeted by the clan
__________________
Check out my two current weekly Magic columns! https://www.coolstuffinc.com/a/?action=search&page=1&author[]=Abe%20Sargent |
|
|
|
|
03-01-2013, 01:57 PM
|
#32 |
|
Hall Of Famer
Join Date: Dec 2001
Location: Catonsville, MD
|
Wave Three
Luzerne from Wave Two is still under battle as Wave Three begin, but the Star League Defense Force, SLDF will win in a few days. Now the Jaguars are ready. The first assaults and waves blasted them and the Nova Cats also shook them. But now, the Jaguars are ready for the next wave. This is where things will get tight. Eight worlds are targeted for Wave Three. There are only 15 systems left. So the remaining troops of the Jaguars are getting smaller and smaller. Marshdale Outer Volta Bangor Schuyler Rockland Garstedt Coudoux Schwartz August 8 sees the third wave begin, while the counter assault is handled. The large numbers of forces engaging the world is staggering. Three, four or five regiments of mechs are landing on some worlds. On Marshdale the Jaguars put up massive amounts of defense. They are elite, and ready. They drag out battle and pounce furiously. But they are defeated and fall. Outer Volta is also nasty. The Jaguars have two units on planet and are not about to allow it to fall easily. However, a few attacks keep the Jaguars down, and after a grind, they are defeated as well. On Garstedt, right next to us, the Ryoken regiment that was supporting us has jumped, along with other friends. But just token resistance in encountered. The same is true of Schwartz, Rockland and Courdoux, with each of those having garrison forces, such as those we encountered, in smaller numbers. Bangor and Schuyler were also large battles, but the SLDF forces overwhelmed the Jaguars, and after fighting heavily, they quickly left. By the end of Wave Three, the Jaguars, having lost Luzerne, and another large number of forces, and with the retreating forces from the counterattack, call a general retreat. Many of their forces choose to leave the Inner Sphere entirely and only a few remain. Wave Three ends on August 23, when the general call of retreat is dispatched.
__________________
Check out my two current weekly Magic columns! https://www.coolstuffinc.com/a/?action=search&page=1&author[]=Abe%20Sargent |
|
|
|
|
03-01-2013, 09:12 PM
|
#33 |
|
Hall Of Famer
Join Date: Dec 2001
Location: Catonsville, MD
|
This allowed more than half of the forces engaged in the Third Wave, plus the counterattack forces that were around and some on the final planets to leave for Clan Space.
With the Jaguars in flight, Wave Four targeted the final 7 worlds left in Jaguar hands – Albiero Savinsville Jeronimo Kabah Stapelfeld Idlewind Richmond This Wave begins on August 26 Some of the planets have been stripped of units and are taken easily. Many have garrison forces, and most put up token resistance as honor demands and then are absorbed into the attacked units as bondsman and isorla (captured materiel). On just two planets, Albiero and Jeronimo, do the defenders fight to the last man. On September 18, 3059 -Operation Bulldog officially ends with Clan Smoke Jaguar ousted from the Inner Sphere.
__________________
Check out my two current weekly Magic columns! https://www.coolstuffinc.com/a/?action=search&page=1&author[]=Abe%20Sargent |
|
|
|
|
03-01-2013, 09:20 PM
|
#34 |
|
Hall Of Famer
Join Date: Dec 2001
Location: Catonsville, MD
|
Operation Bulldog was massively more successful than anyone dreams possible. The lack of clan support by other clans forced the Jaguars to stand on their own. And fall on their own.
But this raises a serious issue with the SLDF. Having defeated the Jaguars much earlier than expected, what will happen to Taskforce Serpent when it arrives at Huntress, the jaguars’ Homeworld in the clans? The addition of all of these front line and battle hardened troops will surely tip the scale in the favor of the defenders. Thus, Victor has ordered many of the SLDF forces to mount up and follow him to Huntress. He will be following the remnants of the Jaguars to their homeworld.
__________________
Check out my two current weekly Magic columns! https://www.coolstuffinc.com/a/?action=search&page=1&author[]=Abe%20Sargent |
|
|
|
|
03-01-2013, 10:33 PM
|
#35 |
|
Hall Of Famer
Join Date: Dec 2001
Location: Catonsville, MD
|
On March 5, 3060 – Taskforce Serpent arrived on Huntress and began the assault. Taking a circuitous route to Clan Space in order to avoid being seen by clans, they took some time but are now attacking the planet of Huntress
They capture most of the planet and begin destroying all major facilities on the planet, and completely removing any chance of Huntress being used for war any time soon. Three trinaries of mechs remained, but they raid the SLDF forces. Discovered on Huntress are small units called ProtoMechs that were being designed by the Clans. They are bigger than elementals but smaller than mechs.
__________________
Check out my two current weekly Magic columns! https://www.coolstuffinc.com/a/?action=search&page=1&author[]=Abe%20Sargent |
|
|
|
|
03-01-2013, 10:37 PM
|
#36 |
|
Hall Of Famer
Join Date: Dec 2001
Location: Catonsville, MD
|
March 19, 3060 - Then the fleeing forces from the IS arrive on Huntress and land in battle. The Jaguars have 340 points of elementals or mechs, which is 5 elementals per point or one mech per point. They still have around 60 fighters. This dices into the beleaguered SLDF forces, and liberates the on planet forces to continue fighting. Many space battles ensue in the sky, with a lot of SLDF WarShips, DropShips and Fighters being destroyed.
March 26 – More Jaguar forces arrive, including Khan Lincoln Osis. The SLDF has become the defender and moved out to guerrilla positions. Mar 30 – Having seen the former Bulldog forces under Victor Ian Steiner-Davion arrive in the system, the Jaguars on planet muster one giant massive attack against the SLDF forces on planet. In the battle, the general of the SLDF forces is killed in action. The SLDF forces in space have to wade throw a lot of things the Jags fling at them, but ultimately win the battle up there.
__________________
Check out my two current weekly Magic columns! https://www.coolstuffinc.com/a/?action=search&page=1&author[]=Abe%20Sargent |
|
|
|
|
03-01-2013, 10:44 PM
|
#37 |
|
Hall Of Famer
Join Date: Dec 2001
Location: Catonsville, MD
|
Mar 31, 3060 – Our unit unloads from an SLDF mech carrier and we have arrived at huntress with nine of our companies, two being left back on the previous planet to continue to heal, fix up clan mechs, and hold onto power there. Those were Weston and Utopia companies.
We were fixed in the two weeks while waiting for lift off, and have soldiers to replace those killed or injured in the battle.
__________________
Check out my two current weekly Magic columns! https://www.coolstuffinc.com/a/?action=search&page=1&author[]=Abe%20Sargent |
|
|
|
|
03-01-2013, 10:44 PM
|
#38 |
|
Hall Of Famer
Join Date: Dec 2001
Location: Catonsville, MD
|
We are now using this Scenario Pack
__________________
Check out my two current weekly Magic columns! https://www.coolstuffinc.com/a/?action=search&page=1&author[]=Abe%20Sargent |
|
|
|
|
03-01-2013, 11:26 PM
|
#39 |
|
Hall Of Famer
Join Date: Dec 2001
Location: Catonsville, MD
|
On Huntress are all major remaining forces of the clan. That includes those forces that fled from the IS as well as those on Huntress that survived.
Landing on Huntress are many, many IS units under the Star league banner. By the time we land, the Serpent units are broken. One unit, the 2nd St Ives Lancers, has just one mech standing from it. The average loss of a Taskforce Serpent unit is 80%. We were not one of those units that did hot drops over major battles to relieve the Serpent unit from the press of the Jaguars attack. Instead, we are one of the units that is assigned to attack en masse on a Smoke Jaguar position about thirty miles away. We are attacking along with four other SLDF forces, and they have about 100 mechs and 50 elementals in defense. We have 450 mechs approached their unit, including our own 108 mechs of Delta Regiment. Like some of the battles in Chapter 6, I will not be simming all of these. I just did five battles for the Bulldog Assault earlier. Instead, I will be doing a few key battles. The Smoke Jaguars, fighting for a home that has been destroyed, massively overmatched, have long since given up any hope of honor. It’s just a grand melee. It is as dirty as any other battle with any Inner Sphere force would be. We are coming in on the west flank, at the same time that three other units advanced – One is a Ryoken unit of the Draconis Combine, one is Com Guards of ComStar and the last is an Federated Commonwealth unit. The Jaguars move out and prepare. They have all of their units a great circle. Then, all of the sudden, they shift formation and charge the unit they deem the weakest. Us. In order to break out. Therefore, we have a full assault of 100 mechs and many elementals attacking our unit. Then the other units will arrive to assist in just a few turns. Connor Ward orders us to hold up and await their advance. We organize, and now the Jaguars are hitting us. The clanners are trying to smash us hard enough to break through our line.
__________________
Check out my two current weekly Magic columns! https://www.coolstuffinc.com/a/?action=search&page=1&author[]=Abe%20Sargent |
|
|
|
|
03-02-2013, 09:14 AM
|
#40 |
|
Hall Of Famer
Join Date: Dec 2001
Location: Catonsville, MD
|
These folks fight in trinaries, not binaries, with 15 point.
Our first foe is this: Gladiator Prime Vulture C Ryoken B Thor D Nobori-Nin B Cauldron-Born A Night Gyr B Dragonfly Prime Koshi A Fenris Prime Puma A Shadow Cat Prime Uller Prime Ryoken C Hankyu B They are clan vet, which is the equivalent of IS elite. These units are taken from the scenario pack, which outlines every mech the various forces had. Arrayed against them is Pyre Company BLR-1D BattleMaster CTF-3L Cataphract ANV-3M Anvil WVR-6M Wolverine AWS-9M Awesome ARC-2R Archer APL-1M Apollo GOL-1H Goliath WTC-3D Watchman COM-2D Commando PXH-1 Phoenix Hawk FS9-M Firestarter After turn 3, at any time, we can pull back our troops and let the Jags pass. Starting on turn 8, reinforcements arrive and push the Jags off us and they fail to penetrate our line. This is their Night Gyr, a 75 ton omnimech with LB2xs and Gausses 
__________________
Check out my two current weekly Magic columns! https://www.coolstuffinc.com/a/?action=search&page=1&author[]=Abe%20Sargent Last edited by Abe Sargent : 03-02-2013 at 09:15 AM. |
|
|
|
|
03-02-2013, 08:43 PM
|
#41 |
|
Hall Of Famer
Join Date: Dec 2001
Location: Catonsville, MD
|
We are fighting on rolling hills. We are on the north and they on the south. They have more than double our battle value between their 15 prime mechs and clan vet pilots.
Turn 1 – We win init. Here we go! Their Dragonfly leaps next to our Phoenix Hawk and I move my Watchman in to base it back. I feinted up the east flank heading south to try and pull them out and I managed to do that with this Dragonfly. We have some trees and hills in the center and spread out. I am moving mechs such as Wolverine, BattleMAster and Awesome into the middle. We focus fire on their Dragonfly to a lesser extent and an exposed Nobori-Nin to a greater one and they on our BM. Let’s see how that worked out. We miss some easy shots, for example, we miss 5s on two LRM15s and an LRM 20 on their NN. Our Watchman fires every weapon at their Dragonfly and needs 7s. He misses on 4 out of 5 weapons. You get the idea. They destroy the LA of our bM and the RL of our PXH. Our Commando hits the ammo on their Dragonfly and destroys the RT> Our PXH destroys its CT and it is down Our BM and PXH fall, the BM took more than 160 damage. Turn 2 – We lose init. Our BM stands. They move a Ryoken C to the same spot their now dead Dragonfly contained. Their Uller bases the downed PXH and I leap our Watchman behind it. Normally I might eject, but now I need the time. I need them to focus their fire on the BM and PXH this turn to finish them off while I gain more ground against other targets. I rush my Cataphract above and adjacent ot their Ryoken, with the hope of punting its head. I leap the FS behind their Hankyu, which based my PXH, Their Fenris bases my BM and one level above it. I focus some fire on the Fenris, and some on their Hankyu. Their Thor destroys the BM’s RA and hits its engine once. Our Archer rakes both the RA and LA to pieces on their Fenris, and our Apollo follows with the LT. Their N-N destroys the CT on my BM. Their Puma destroys the LT of our PXH. Their Fenris hits the ground. Their Ryoken was kicked by the Cataphract in the CT and falls. Other physical attacks ensue. Their Uller lost a Hip and Foot actuator from a Watchman kick but remained standing. Turn 3 – We lose init. I keep the PXH out to keep it as a target and decoy for them. Their Ryoken rises. Their Fenris is now weaponless but manages to stand. Our FS leaps behind their Uller. It nails the Uller’s gyro. A Ryoken destroys the RT of the PXH. Our Cat opens the CT of a Ryoken up and hits the engine once. They hit an ER PPC on our Awesome. Our Awesome gets a LL blown off crit on their Fenris and that puts it ou t- no weapons, and now can’t stand. They destroy the LL of our Cataphract. It falls, as does their Uller and a Ryoken. Our FS kicks and hit he engine 2x and gyro 1on the Uller. Gyro down, mech out. Turn 4 – We lose init. I still don’t eject the PXH or CAT. I leap our FS in front of their wounded Hankyu. None of their downed mechs stand. Their Night Gyr hits and destroys our Awesome’s RT and CT. Before it went down, it sheered into the H of their N-N and hit the cockpit with an ER PPC. Then it hit the AMS ammo on the Koshi and blew up its LA. The Gladiator tears into our FS and smashes our gyro three times. It’s down. Our Watchman destroys the RA on the damaged Ryoken C. That Ryoken hits the ammo on the PXh and it explodes. Just the arms remain. Before dying ,the FS hits the engine once on their Hankyu. No falls, despite targeted fire on their Thor to the tune of 80 damage. Turn 5 – We lose init again. They are moving their mechs up now, secure in being able to blow through the rest of our forces. Plus, they need to hurry. With an essentially dead Cat, we have 7 mechs left, including two scouts in that number. I leap our Watchman to the rear for their Shadow Cat. Our Commando suicide walks to their damaged Hankyu to absorb some fire and to get blasted. Their S Cat had its MASC freeze when it used it. Our Commando hits and destroys the Kanhyu’s RT and shuts it down with engine problems. Their Puma destroys the RA of the Commando. Our Anvil nails the H twice on their Thor, one a glancing blow with a ML and the other a regular hit with it. Our Wolverine hit sthe engine on their Ryoken C. It hits the Cataphract’s RT and it shuts down. Their Shadow Cat hits the Commandos ammo and it ignites, and the engine is destroyed and fails, lighting up the sky. It blows off the LA of their Uller on the ground. Our Goliath nails the CT of their Ryoken C and destroys it. Their Night Gyr opens the Anvil and hit the engine twice. Turn 6 – We lose init. We have six mechs left. I leap my Wolverine into the midst to distract them. S Cat has another MASC failure. Their Shadow Cat hits the machine gun ammo on my watchman, CASE blows it out, destroys the RT and the pilot blacks out. Turn 7 – We win init. I leap the Wolverine beside their S Cat. They destroy the other chest of our Watchman. Their Puma hits the gyrox3 and enginex2. Our Archer destroys the LT on their Koshi and our Apollo follows by destroys its CT. Our Goliath smashes the Gauss on their Shadow Cat, destroys the RA, and blacks out the pilot. Our Apollo falls from damage. And with that, turn 8 has begun and backup forces from other regiment shave begun to arrive, forcing the Jaguars back. We took a nasty pummeling. Within a few minutes, we lost seven mechs.
__________________
Check out my two current weekly Magic columns! https://www.coolstuffinc.com/a/?action=search&page=1&author[]=Abe%20Sargent Last edited by Abe Sargent : 03-02-2013 at 08:44 PM. |
|
|
|
|
03-02-2013, 08:45 PM
|
#42 |
|
Hall Of Famer
Join Date: Dec 2001
Location: Catonsville, MD
|
Salvage N Stuff
Dragonfly Prime RA, H, LA, LT, RL, LL Fenris missing RA, LA, LT Uller engine, gyro x2 each, reattach LA Nobori-Nin cockpit hit Koshi H, RT, RA, RL, LL Ryoken C RT, LT, H, LA, RL, LL Hankyu, missing RT, enginx3 Shadow Cat missing RA Watchman missing RT, LT, enginex2, gyrox3 Awesome LT, LA, RA ,H, LL, RL BattleMaster RT, LT, LL, RL, H Phoenix Hawk RA, LA Firestarter, gyrox3 Cataphract missing LL, RT Commando LA
__________________
Check out my two current weekly Magic columns! https://www.coolstuffinc.com/a/?action=search&page=1&author[]=Abe%20Sargent |
|
|
|
|
03-02-2013, 09:37 PM
|
#43 |
|
Hall Of Famer
Join Date: Dec 2001
Location: Catonsville, MD
|
In the rest of this battalion, Blaze and Ember, we have similar results. We hold on, but lose 5 mechs in one and eight in the other.
But what about the other two flanks? This central flank was hit hard with nothing but mechs, but the flanks had elementals in place of this high number of mechs. This is Aegis Company: Daishi Prime Man o War H GAL-1GLS Gallowglas ON1-K Orion GUN-1ERD Gunslinger DAI-01 Daikyu TBT-7A Trebuchet ARC-2R Archer STY-3C Starslayer STG-3G Stinger SDR-5V Spider ASN-40 Assassin They have good mechs and good pilots. They should do well against their foes: Jags 25 Elementals Vulture Prime Dasher Prime Loki B Ryoken A Masakari Prime Daishi A Kingfisher D Man O’ War Prime Black Hawk C Hankyu A So ten mechs and 25 Elementals. That’s not bad numbers from one sense. They are all clan veteran, so IS elite. They also have four assault mechs – Daishi, Man o War, Kingfisher and Masakari. So not obviously easy there. Same rules apply – can retreat any turn after 3 and let them go. Have to hold to turn 8 and then they retreat. Battle values are a little more even this time. We are again facing some hills and modest trees.
__________________
Check out my two current weekly Magic columns! https://www.coolstuffinc.com/a/?action=search&page=1&author[]=Abe%20Sargent |
|
|
|
|
03-03-2013, 08:38 AM
|
#44 |
|
Hall Of Famer
Join Date: Dec 2001
Location: Catonsville, MD
|
Turn 1 – We win init. I set up by a few forests and with my many jumper moving around – this is a very agile company of mechs. I leap my light and medium mechs around, into woods, in order to distract our foes and hopefully draw fire away from the good mechs farther away setting up sniping positions. Our Spider tried to jump to a Position that was actually hiding their Dasher., but we couldn’t see it. The Dasher has its MASC lock (rolled a 2 on 2d6) and fell down and its RL was blown off but on the ground. I focus some fire on their Daishi. I can’t let this many assault mechs hit me for too long by playing with their mediums and lights. Unfortunately, due to the terrain not all of my mechs can draw a bead on it. They get a thro8ugh armor critical on our Orion, hit the ammo, it ignites, the shielding on the mech’s engine goes off and it explodes and blasts three adjacent mechs for a lot of damage. Three of my mechs took 30 damage, one 15 and another 7. No pieces survive and the pilot, while ejecting, is killed by the blast. Their Kingfisher destroys the LA and LT of our Stinger and hits the engine twice. Nobody falls.
Turn 2 – We win init. Their Dasher fails to stand, and tumbles back down. They same thing happens ot our Stinger – they destroy its CT, it explodes, the pilot can’t get out, and it hammers adjacent elementals and the Starslayer. Elementals savage our Assassin and destroy its RT. Our Man O’ War destroys the LT on their Daishi. Our MOW falls. We ignited the hex their Daishi was in on fire. Turn 3 – We lose init. We have lost two mechs and not even killed one of theirs. This is not the start we had envisioned. Our MOW rises. Their Dasher stands, so I leap our Gallowglas above it and next to it. I leap our damaged Spider up by one of their encampments on the southeast. Their Ryoken falls when making a piloting skill check on terrain. Some of my mechs can draw a bead on their Loki. Our Gallowglas’s medium pulse laser dances into the Dasher and destroys its CT. Twin gausses from our Gunslinger stab into their Loki and smash an engine once. Our Daiku follows by smashing the gauss on the Loki and it loses its RA in the blast. The Loki pilot blacks out from the explosion’s feedback. One of the Ultra AC5s on the Daikyu jams. Our Daikyu falls from some damage. Their Masakari legs our Spider. Turn 4 – We win init. Our Daikyu stands. Just like the Wasp, I leave the Spider out there. Their Daishi moves back from behind the firey hex into heavy smoke. I leap our Assassin to the hex it vacated. I move my Starslayer into position to assist with the Daishi next turn if needed. Their MOW hits the RT on our Daikyu and it shuts down due to an XL engine. We focus fire on their Kingfisher and it rtook more than 120 damage. It falls hard. T5 – We lose init. Their KF rises. Their Daishi remains in its place so I hope out the Assassin and hop in the SS> I also leap our Gallowglas up some hills and close to the Daishi. Their Black Hawk destroys the CT of my Spider. Our Trebuchet chased their damaged hankyu and shot it with lasers. It destroyed the Hankyu’s LA, RT and CT with the lasers and a lucky LRM 15 hit. Our Archer destroys the LT of their Kingfisher. After taking more than 100 damage, their KF again falls. Turn 6 – We win init. Their KF rises again. I hop the Assassin back ot their Daishi after moving off the SS. I also leap over the Gallowglas and unload, alpha striking the Daishi. Our Gallowglas destroys the RA of their Daishi. I move some weapons to their Masakari and it falls. They hit my SS badly and it falls. Our Assassin punches with its one arm and hits their Daishi, hits the CT, and nails the gyro twice. Dead Daishi. It legs the Assassin and destroys its LL with a kick. T 7 – We lose init. Their Masakari stands. Our SS rises and rushes into some woods. I alpha strike the Masakari and Kingfisher trying to take out both this turn. Our Gallowglas hits the engine once on their Masakari. Their Vulture destroys the RA of our Gallowglas (GG). A gauss slug smashes the CT of their Masakri and it is down. Our trebuchet nails the gyro on their Kingfisher once. Their MOW hits the engine and gyro once each on our SS> The Ultra AC10 on our MOW hits the CT of their Kingfisher and destroys it. Both our GG and SS fall. Our SS pilot is knocked out in the fall. And with that they are forced to retreat under the blasts from others. We lost several mechs permanently – Orion, Stinger, Spider. We also lost two MWs and saw a lot of damage to our mechs.
__________________
Check out my two current weekly Magic columns! https://www.coolstuffinc.com/a/?action=search&page=1&author[]=Abe%20Sargent |
|
|
|
|
03-03-2013, 08:38 AM
|
#45 |
|
Hall Of Famer
Join Date: Dec 2001
Location: Catonsville, MD
|
Salvage N Stuff
Dasher Prime RL, LL, RT, LT, H, RA, LA Daishi missing LT, RA, gyrox2 Loki enginex1, missing RA Hankyu LT, RA, H, LL, RL Kingfisher RT, RA, LA, H, LL, RL Masakari RT, LT, H, LA, RA, LL, RL Orion completely destroyed, MW deceased Stinger completely destroys, pilot dead Assassin missing RT, LL Spider LL, LT, RT, LA, RA< H Daikyu missing RT Gallowglas missing RA Starslayer, gyro, engine In the other two battles with this battalion, we lost 4 and 6 mechs, but we held.
__________________
Check out my two current weekly Magic columns! https://www.coolstuffinc.com/a/?action=search&page=1&author[]=Abe%20Sargent |
|
|
|
|
03-03-2013, 08:59 AM
|
#46 |
|
Hall Of Famer
Join Date: Dec 2001
Location: Catonsville, MD
|
The final assault by the Jaguars is on the other flank with similar numbers of elementals and mechs as this one.
One company in that battalion is Bandit Company AS7-K Atlas DRG-5N Dragon STC-2D Striker HCT-3F Hatchetman LGB-7V Longbow WHM-7S Warhammer VND-3L Vindicator GUN-1ERD Gunslinger ALX-1kc Alexander VLK-QD Valkyrie WVE-5N Wyvern BUM-1 Bumblebee Here are our Smoke Jaguar foes. Vulture Prime Koshi D Grendel C Ryoken Prime Ryoken A Thor C Daishi Prime Nobori-Nin A Cougar A Cougar Prime 25 Elementals They are all vet for clan, which is elite for IS. Our company is all vet. Again, same rules for turns apply, we are on north, and there are randomized hills with some water instead of a lot of trees, since a brook runs through here.
__________________
Check out my two current weekly Magic columns! https://www.coolstuffinc.com/a/?action=search&page=1&author[]=Abe%20Sargent |
|
|
|
|
03-03-2013, 06:23 PM
|
#47 |
|
Hall Of Famer
Join Date: Dec 2001
Location: Catonsville, MD
|
I set up with a feint. A large hill ins in the middle but we can see down both sides. I have my heavy and slow forces on one side and my medium and light on the other that can jump. I intend to move all of my forces to the heavy side and blast the enemy there and split them for a few turns.
Turn 1 – We lose init. I have hid the Hatchetman behind a level 3 cliff face and will keep it there until they get close and leap out. I begin to leap my mechs out of the spot as they advance down that line on the east side, concentrating on the west. I expose my Dragon by running it behind a Grendel moving slowly up the hill. Leaping away are mechs like the Alexander, Wyvern, Vindicator, Bumblebee and Valkyrie. Our Striker destroys the RA of their Koshi. Our Wyvern takes some damage and falls. Turn 2 – We win init. I rise the Wyvern. They move their Grendel to the top of the hill above my Vindicator. Their Thor moved into the water, so I focus a lot of fire on it. It destroys the LA of our Dragon. An ER Large Laser slices into the H of our Gunslinger, and slays the MW and destroys the mech. Our Striker nails the H of their Thor and smashes the sensors and life support on it. Nobody falls. Turn 3 – We lose init. I run my Bumblebee to the rear of their Daishi. I also run the Alexander three hexes behind the Daishi to give me two sets of medium lasers to jack into it. Our Hatchetman leaps out. I lance out 13 medium lasers by the Alexander and Bumblebee. Gauss rifle to the Head by our atlas ends the Thor. Our Longbow lances missiles into their Cougar Prime and destroys is LT. They savage our Wyvern and hit its engine twice. Elementals have badly peppers our Vindicator as well. Our Warhammer finishes the LA on their Thor too. A PPC from our Vindicator jets into the Cougar Prime’s CT and destroys it. More Elemental fire arrives and they ignite the LRM ammo in the Vindicator and the CASE blows it out the RT. 8 of the 13 medium lasers slam into the Daishi. Our Vindicator falls and the pilot is knocked unconscious, its LA being lost in the fall. Under damage, our Alexander tumbles too. Our Striker falls under damage and the pilot blacks out. Rough turn for us, despite taking out two mechs of theirs. Our Wvyern, Vindicator, Alex and Striker are all on the ground with two blacked out pilots and the first two are essentially gone. Turn 4 – We lose init. I don’t move the Atlas and keep it next to the Striker to protect it from anyone who might close. Our Alexander rises and runs. Elementals have now reached the top of the hill in the center of the map, and that’s bad. I run my Valkyrie out to try and distract fire from the Alex or a wounded mech. I retreat my Bumblebee from their Daishi. Random shots by my Longbow on the only real target, the N-N go internal and hit two leg actuators. We mostly focused on their Daishi. Their Cougar this and destroys the Vindicator’s CT. The pilot is injured in the ejection but barely survives. The N-N tumbles. Our Striker pilot wakes up. Turn 5 – We win init. I drop the wyvern to prone behind some hills. I stand the Striker. Their N-N can’t stand. I run up my Hatchetman, Bumblebee towards the slowed N-N. No one can get close to basing it until I leap the Valkyrie behind it. I leap the Alex nearby as well. Their Daishi destroys the LA of our Valkyrie. A Ryoken hits the ammo on the Dragon and ignites its LT. Their Vulture nails the ammo in the RT of the Dragon too. After taking four blasts of damage, the pilot blacks out. Our WHM smashes the engine twice on their N-N with an ER PPC. Our Bumblebee destroys the RT and CT of it. The Dragon falls and hits its gyro twice and engine once. Dead mech. Turn 6 – We win init. I back up the Striker but leave the untouched Atlas where it is to act as a decoy. I leap the bumblebee behind their Grendel and the Hatchetman adjacent to the Daishi. We move to focus fire on their Vulture as their Daishi shifts behind a hill. Their Vulture tumbles, nothing else major in weapons phase. We call up with the hatchet to the Daishi. We need an 8, roll a 9, and hit the….CT. Ah well. Turn 7 – We win init. I leave my Striker, damaged, in the corner of the map and run my Atlas forward to get better angles. They move not their Daishi, so I keep my Hatchetman in place too. Their Daishi destroys the LL of my Hatchetman and it falls. No hatchet chance. We drop their Daishi but can’t do anymore.
__________________
Check out my two current weekly Magic columns! https://www.coolstuffinc.com/a/?action=search&page=1&author[]=Abe%20Sargent |
|
|
|
|
03-03-2013, 06:25 PM
|
#48 |
|
Hall Of Famer
Join Date: Dec 2001
Location: Catonsville, MD
|
Salvage N Stuff
Cougar Prime RT, LA, RA, H, LL, Rl Koshi D missing RA Thor C missing H, LA Nobori-Nin A RA, RL, H, LT, LA, LL Valkyrie missing LA Dragon missing LA, LT, RT, engine, gyrox2 Gunslinger missing H, dead MW Vindicator RT, RA, LL, RL, H Hatchetman missing LL
__________________
Check out my two current weekly Magic columns! https://www.coolstuffinc.com/a/?action=search&page=1&author[]=Abe%20Sargent |
|
|
|
|
03-03-2013, 06:26 PM
|
#49 |
|
Hall Of Famer
Join Date: Dec 2001
Location: Catonsville, MD
|
We manage to keep the Jaguars from pushing through. The other two companies of this battalion do similarly. We just lost one mech unsalvageable but three went down. The other companies lost 2 and 5 mechs respectively.
The other three regiments clean up the remaining Jaguar forces. We finish off a few mechs that were legged or couldn’t retreat, and then we grab salvage, take bondsman, and more. We lost eight mechwarriors in the battles today.
__________________
Check out my two current weekly Magic columns! https://www.coolstuffinc.com/a/?action=search&page=1&author[]=Abe%20Sargent |
|
|
|
|
03-03-2013, 07:23 PM
|
#50 |
|
Hall Of Famer
Join Date: Dec 2001
Location: Catonsville, MD
|
April 9, 3060 – The Jaguars have been cleansed from Huntress. In a special ceremony, Victor takes the last sign of Smoke Jaguar, a huge tile,, and breaks it and congratulates everybody.
He then collects a force of Operation Bulldog troops and blasts off for Strana Mechty, the homeworld of the clans. We are left behind to help garrison and recuperate on Huntress.
__________________
Check out my two current weekly Magic columns! https://www.coolstuffinc.com/a/?action=search&page=1&author[]=Abe%20Sargent |
|
|
|
 |
| Currently Active Users Viewing This Thread: 1 (0 members and 1 guests) | |
| Thread Tools | |
|
|


