| Albums |
| Screenshots |
| Videos |
| Communicate |
| Friends |
| Chalkboard |
Official players guide for Fifa09 from EA Sports. *updated 9/28!* 56k warning...
This is a discussion on Official players guide for Fifa09 from EA Sports. *updated 9/28!* 56k warning... within the EA Sports FIFA Last Gen forums.
|
||||||
 | MLB The Show 24 Review: Another Solid Hit for the Series |
 | New Star GP Review: Old-School Arcade Fun |
 | Where Are Our College Basketball Video Game Rumors? |
| Search Forums |
| Advanced Forums Search |
| Search Blogs |
| Advanced Search |
| Go to Page... |

|
|
|
Thread Tools |
|
|
#17 | ||||||||||||||||||||||||
|
*n th* Fl*w*rs
|
Re: Official players guide for Fifa09 from EA Sports. *updated* 56k warning...
|
||||||||||||||||||||||||
|
|
|
|
#18 |
|
Semi-retired
|
Re: Official players guide for Fifa09 from EA Sports. *updated* 56k warning...
Beating Your Opponent One-on-One
We have taken a look at Basic Skill moves, Advanced Skill moves, and Combo moves. You should have a pretty good feel for how each one works, and how to execute each move. The more time you spend working on your moves in the Arena, the quicker you will be able to perform them. We recommend starting with the basic moves like the Body Feint, Stepover, and Reverse Stepover. Then move on to the 360 Roulette and other more advanced skills. Now it is time to take your new skills to the pitch and put them to use against both CPU and Human Opponents. You can be successful at Fifa 09 by just working the ball, using good tactics, and finishing, but what fun would that be? Breaking the ankles of a CPU defender or smoking our friends player and leaving him in your wake is much more fun. We recommend avoiding skill moves in your own defending third. You could execute a simple Drag Back or Ball Roll if you are not under pressure and want to hot dog a bit. Skill Moves can be risky, and you dont want to be risky in your defensive half. As you approach the halfway line, you can begin to pull out more of your arsenal. The final third is a great place to put your skills to use, as often you will have to beat a defender in order to get a chance on goal. In addition, using skill moves will often force the defence to foul you. This will provide you with set piece opportunities in dangerous areas of the pitch. Control the Ball One of the best pieces of advice we can give you when it comes to beating players off the dribble is to learn to lay off the Sprint button. You cant turn as sharply, and your player is much easier to knock off the ball when he is at a dead sprint. Only use the Sprint button when your player has lots of open field, or to briefly explode past your opponent after you make a skill move. There are a number of different skills that your player will utilize even when you dont activate a skill. For example, top skilled players like Ronaldinho and the like will use a Cruyff move when they make a 180 degree change of direction. Highly skilled players will also be able to perform double-touch moves with the ball as they quickly change direction from side to side. You can beat overeager defenders by just keeping your player at a jogging pace and making quick change of direction moves. Use Change of Pace Once you have mastered controlling the ball in tight spaces, you can begin to use change of pace to beat defenders. Use the Stop ball control liberally. Take a few dribbles, perform a hard stop, and then explode in a different direction. Once you see a defender lean the wrong way, use the Right Thumbstick to knock the ball in a different direction. Make sure you have plenty of room, or you risk knocking the ball too far ahead into a second defender. Stop and go play is especially effective against human opponents. Blast straight down the field, hit R1/RB to hit the brakes, and then accelerate in a new direction. Youll be able to create acres of space with this technique. The Importance of Exits One aspect of the Skill Move system that is often overlooked by Fifa gamers is the Exit move. While the Skill Move is pretty to watch, the Exit move is what makes the skill worth performing. Exit moves allow you to explode in a new direction and take advantage of a defender who has bitten on your fake. NOTE: One mistake that gamers make is to perform the Skill Move too close to a defender. You need to be sure that there is enough space between your player and a defender to execute the move. You can get results even if the defender is 5 yards or more away. He will still bite on the fake. You will want to spend time in the Arena looking at all the different types of Exit moves that can be performed. Look specifically at the Stepover, Reverse Stepover, and Drag Back moves. Often a very simple stepover can reap huge benefits if it is coupled with an explosive exit. 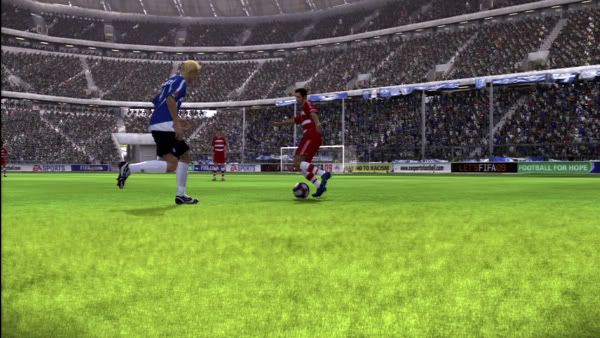 In this example, Ribery begins to perform a Reverse Stepover as his defender closes in. 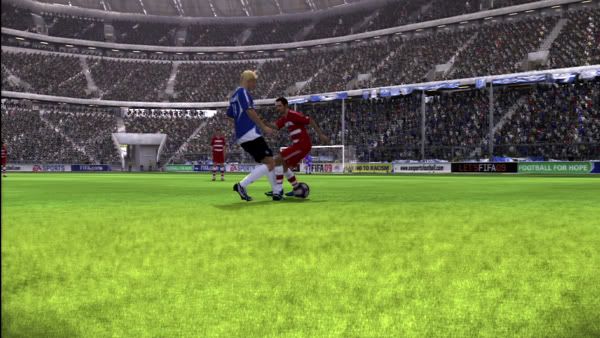 With the move completed, Ribery starts to push the ball to the left with the outside of his foot. 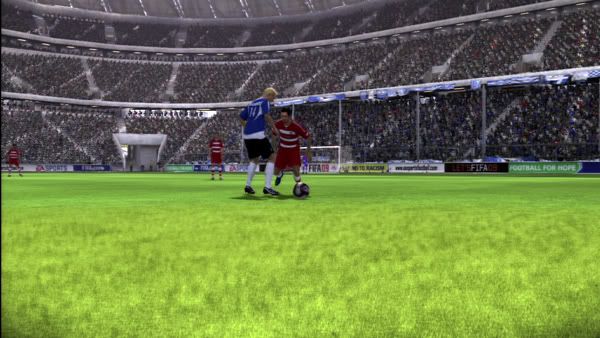 Already you can see him begin to clear his shoulders and seal off the defender. 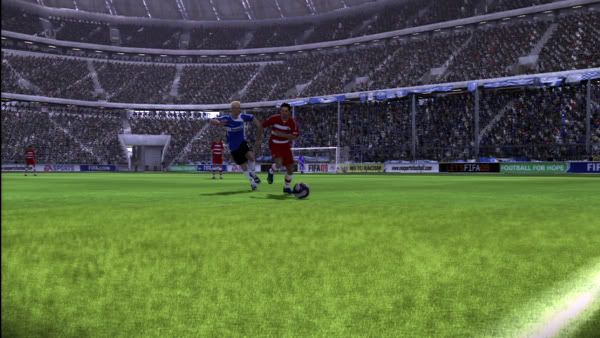 Ribery completes the move and leaves the defender in his wake. Best Moves & Combos to Beat Your Defenders In this section of the guide, we will show you some of the best moves to use to beat defenders in one-on-one situations. Just about every skill move in the game has its proper place, but we have found that some moves are more effective than others. Body Feint w/Drag Across Exit This move is very strong in the open field. If you time it right, youll go by the defender almost every time. It can also be an effective choice when you get one-on-one with a keeper. 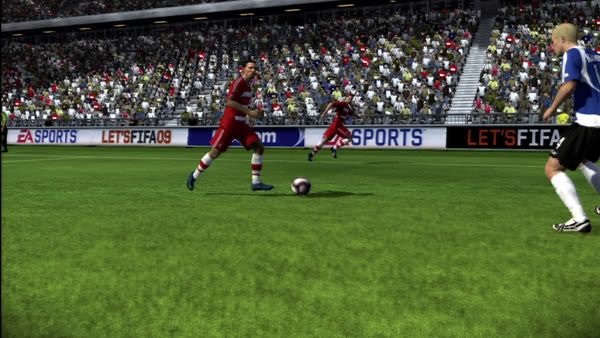 We are dribbling with Ribery in the middle of the field with an approaching defender. 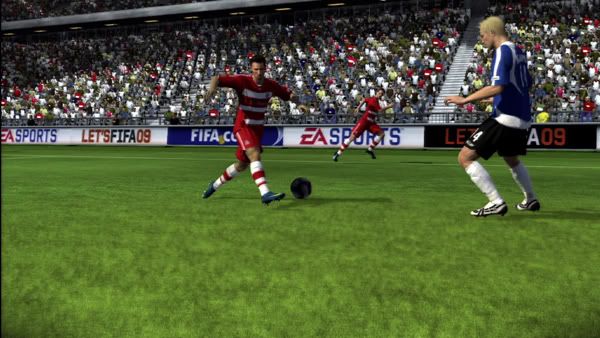 We fake to the right with the Body Feint skill move. 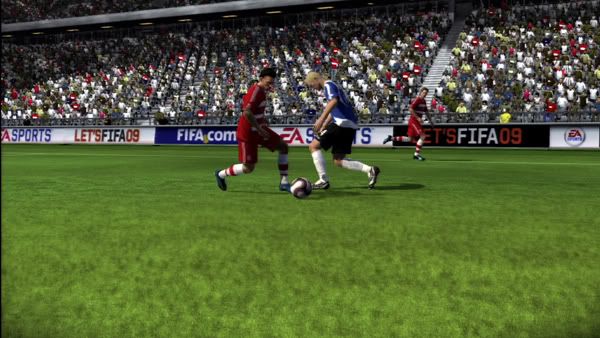 After the fake, we exit forward and to the same side that we faked (45 degree angle Forward/Right). 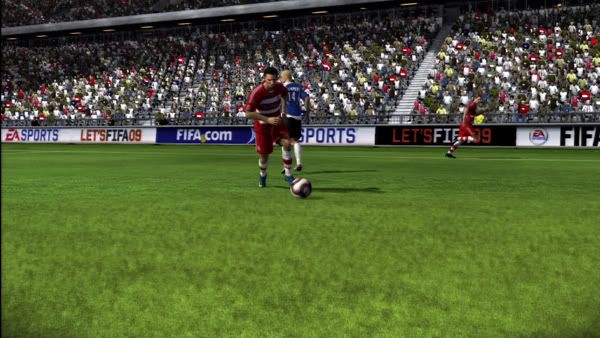 We easily break free of our defender and head into open field. Head-On Ball Roll This is one of the simplest (and thus most overlooked) moves in the game. You can use this move to change lanes when a defender is attacking your player head-on. Look to see if the defender is shading to one direction, and go the opposite one. 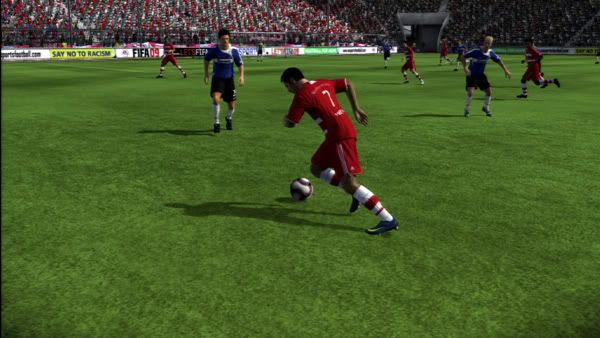 We charge down the sideline with Ribery, ready to take on the defender. 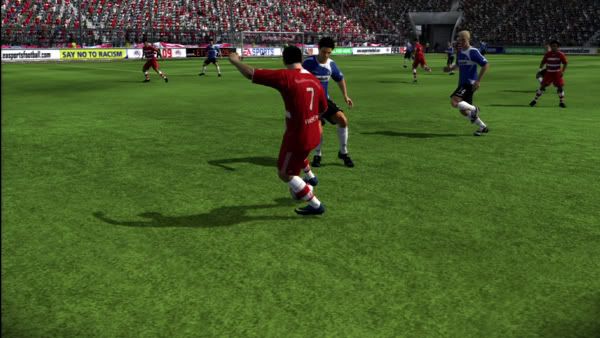 The trick is to slow down just a bit and let the defender commit to his tackle. 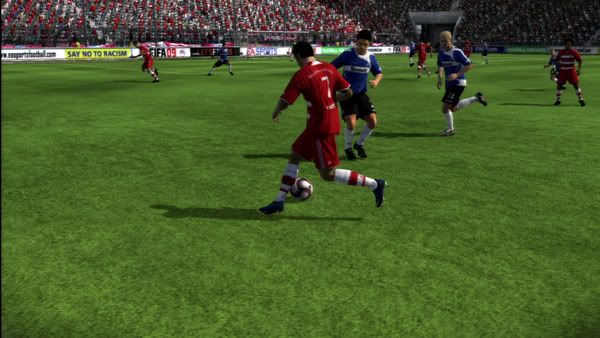 We slap roll the ball to the left side (opposite of the side the defender was shading). 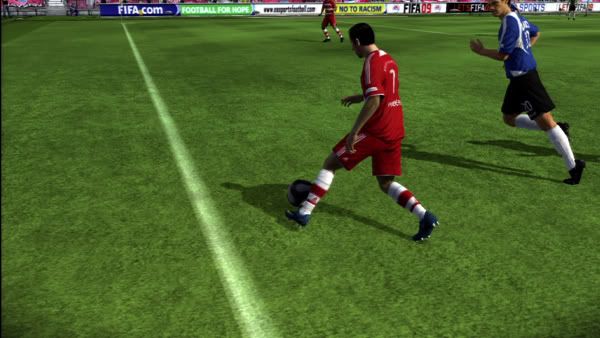 Ribery has space to escape down the sideline. This would be a good opportunity to use a Knock On and exploit Riberys speed advantage. Jump Slide Tackle If you are playing an opponent who is a slide-tackling machine, then youll want to break out this move to slow him down. We dont recommend using it often against the CPU as they are tough to fool, but an overaggressive human defender can often be exploited. 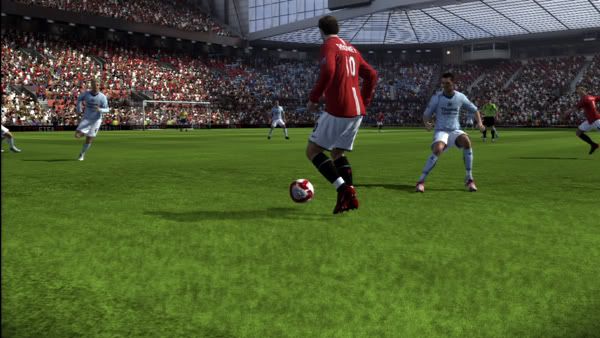 We are dribbling the ball with Rooney and see our friends defender closing in for the slide tackle. This is his defensive tactic of choice when we are racing down the sideline. 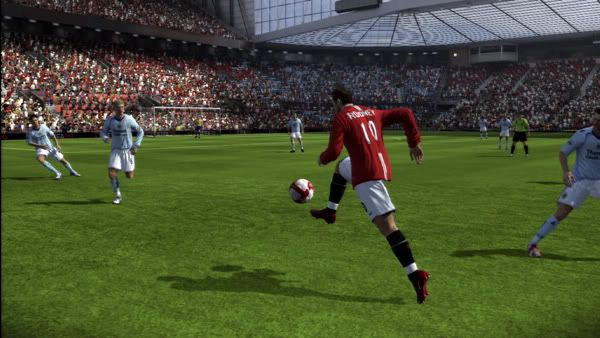 We execute the move early to be sure that we can clear the defender. It looks really early in the picture, but trust us, its perfect. 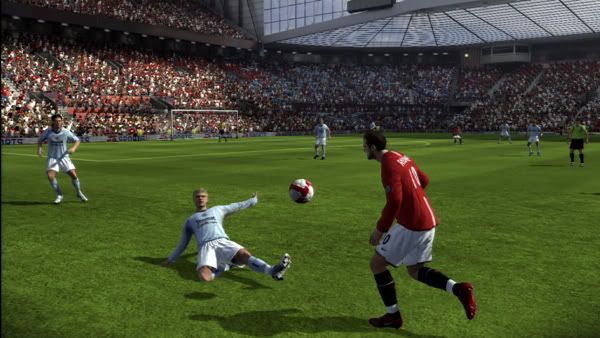 Here comes the slide, right on cue. 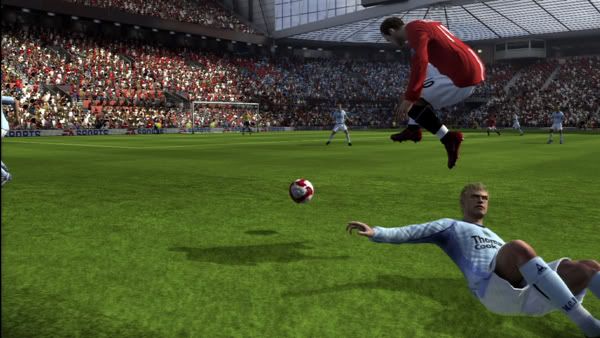 Rooney completes the move by leaping over the would-be tackler. McGeady Spin Named for Celtic player Aiden McGeady, the McGeady spin is useful all over the pitch. You can use it to turn and get a shot off with a defender on your back. It is also useful to fool a defender and create space when you are face up with your opponent. 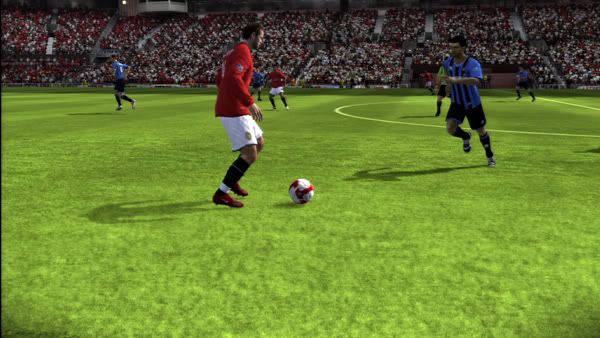 We have the ball with Rooney in midfield with a defender closing in. 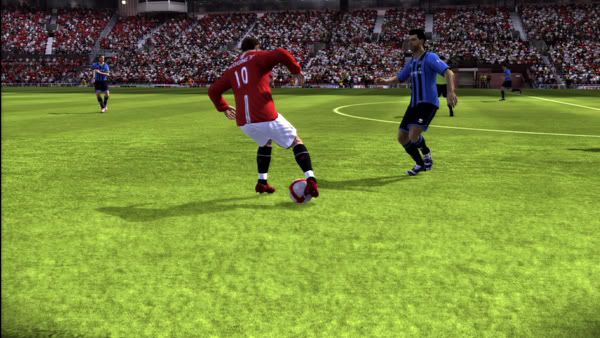 Rooney begins to execute the move by pulling the ball away from the defender and shielding it with his body. 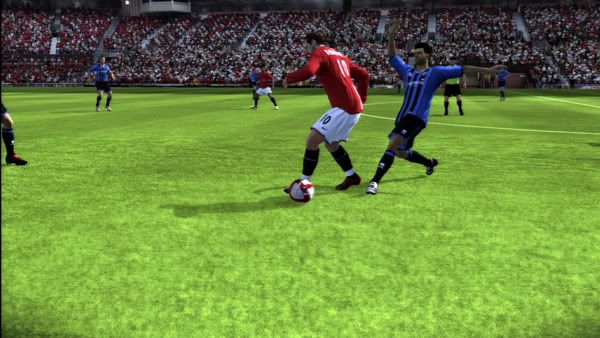 Rooney pivots and pushes the ball away with the outside of his left foot. 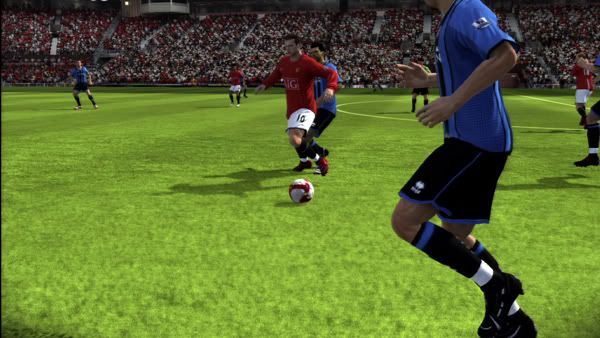 We now have the space we need to take a couple of touches on the ball and find an open player. Reverse Stepover Drag We just love the way this move looks. It doesnt hurt that it is very effective as well. If you like a little bit of flair in your game, but dont want to sacrifice function, then the Reverse Stepover Drag is going to be right up your alley. 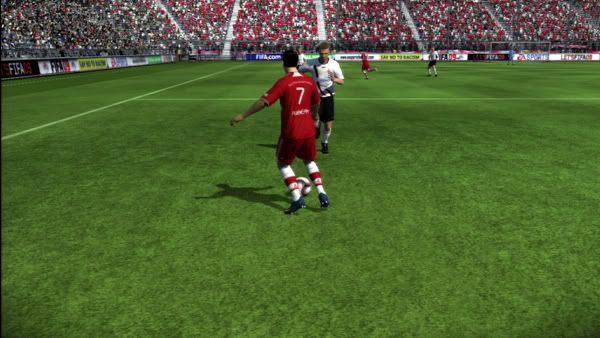 Again, we have Ribery with the ball as we prepare to embarrass yet another hapless defender who over commits to his tackle. 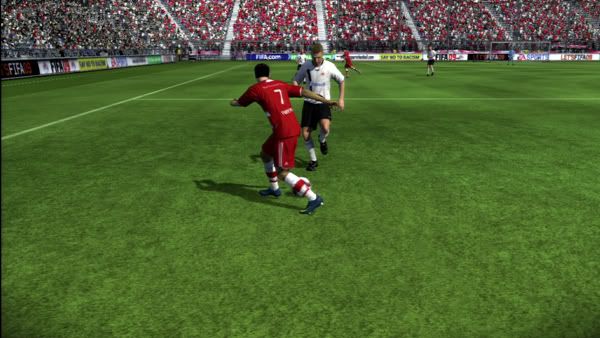 We complete our Reverse Stepover fake as the defender closes in. 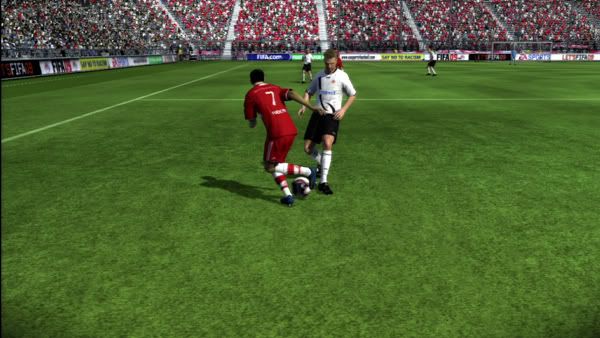 We exit the move Forward/Left. Ribery complies by dragging the ball forward with the heel of his rear foot. 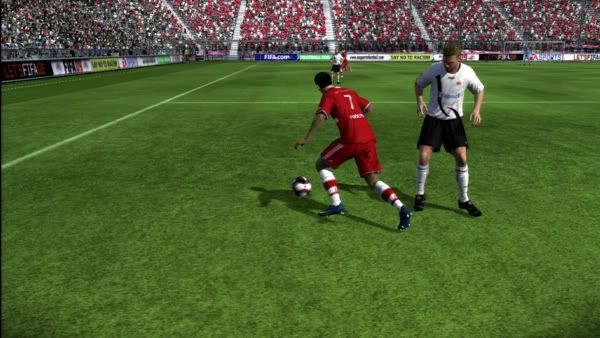 The defender can only look on as we explode right by him into open space. 360 Roulette This move can be executed just about anywhere on the pitch, but it is most effective in the middle of the field. You can get closer to defenders before performing the 360 Roulette than any other move. For that reason, it can be useful when you have taken a bad touch and have a defender swooping in for the tackle. 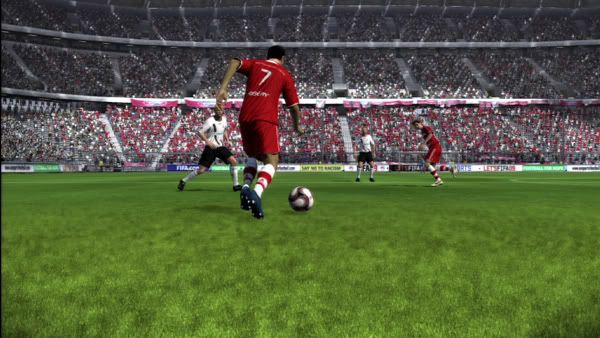 We have just received a through ball with Ribery and are still fighting to get control of the ball. Unfortunately, a defender is closing in rapidly. 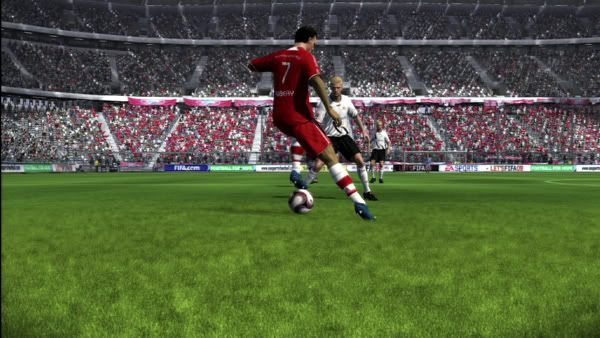 We perform a panic 360 Roulette in hopes that we can beat our defender and keep possession. 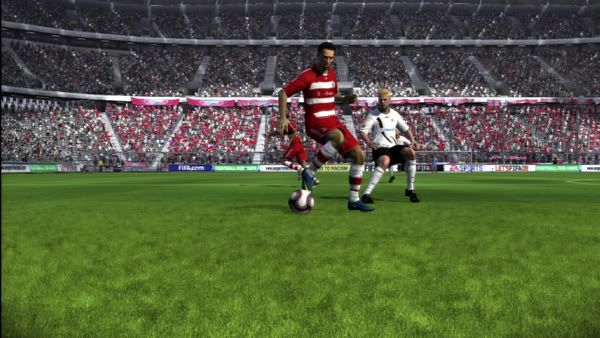 We successfully shield the ball as we make our turn. The defender is trying to check his momentum, but has committed too far to stop us now. 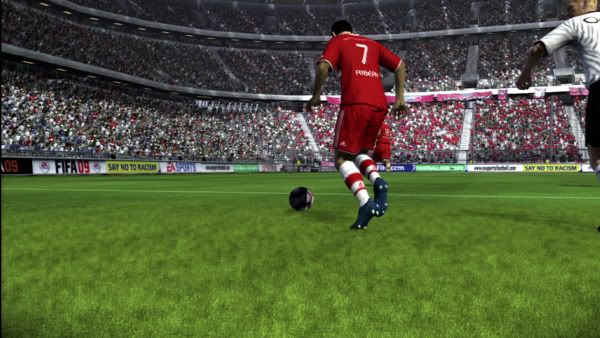 There is a lot of open field ahead of us as the defender tries to desperately close the gap. If you can beat the Central Midfielders with a skill move, it often opens up a great attacking opportunity for you, as your forwards will occupy the attention of the Central Defenders. Ball Roll to Cross Crossing on the run can work, but if you can square up on the goal and take your time, then your crosses will be much more accurate. Burst down the sideline and then use the L1/LB button to face the goal. Usually the defenders will come charging in at you. This is when you pull out the Ball Roll to create space to get your cross in. 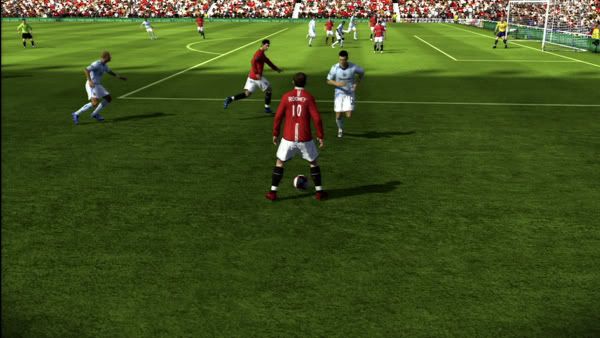 We are able to get Rooney down in the corner and square up on goal. 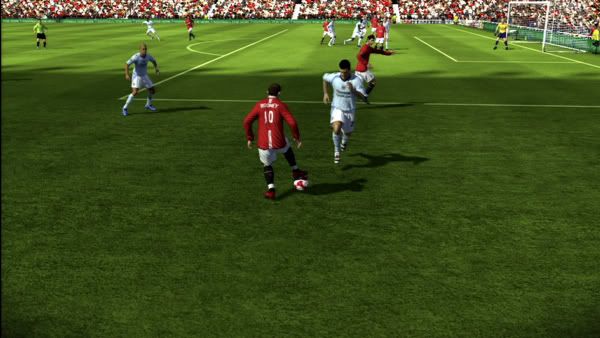 As the defender charges in, we begin to execute the Ball Roll. 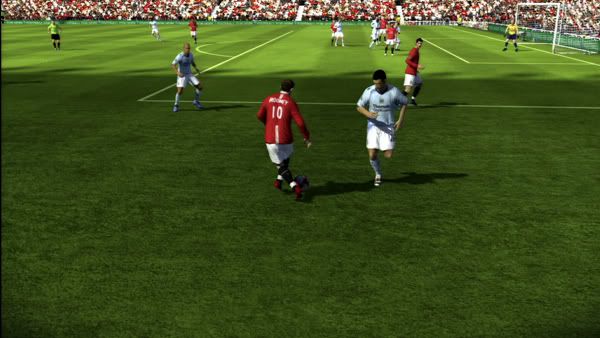 Rooney completes the move as the defender tackles empty air. 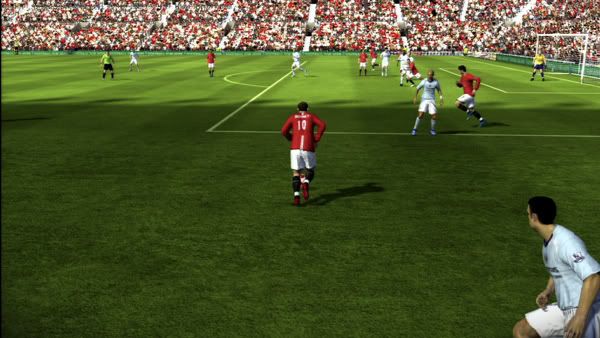 We have plenty of room to cross the ball or burst into the box for a shot of our own. Ronaldo Cut Cristiano Ronaldo is most known for this quick behind-the-leg cut, but Rooney can pull it off just as well. You will use this move typically down the sideline with a defender in hot pursuit. It works best if the defender is slightly ahead of your player. 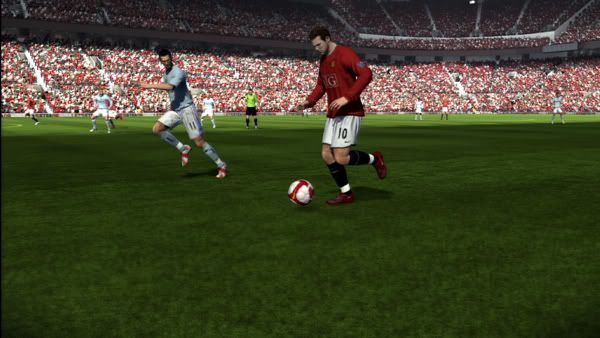 We are busting down the line with Rooney. A defender is shadowing us and is ripe for the Ronaldo cut. 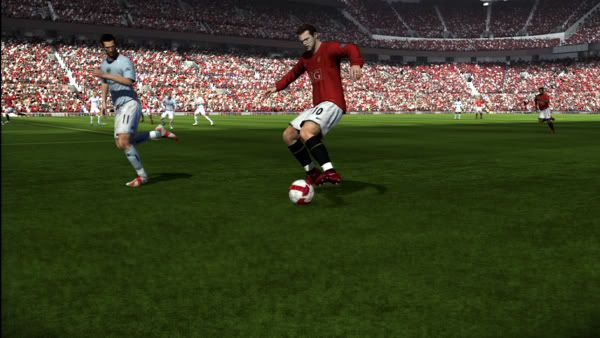 We execute the Ronaldo cut. Rooney throws his inside leg forward to clear room for the cut move. 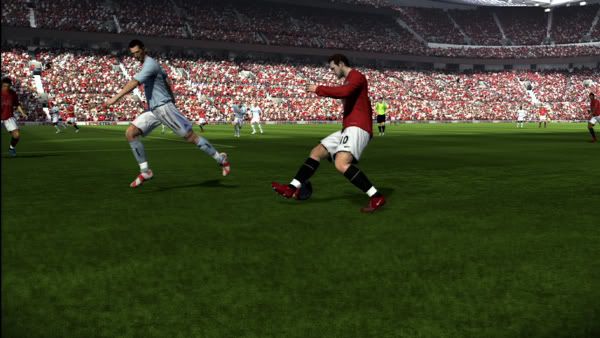 Rooney heel flicks the ball behind this leg and to the inside. 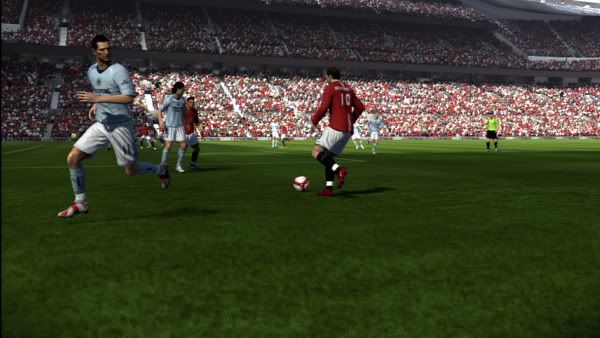 The defender cant match our move and Rooney cuts inside unmarked. Shield Ball to Spin Out A strong player can hold the ball up and protect it from a defender with the Shield Ball move. Target men can use it to keep position while the other strikers and midfielders join the attack. By holding the R2/RT button, your player will go into shield mode. You can then use the Right Thumbstick to perform ball fakes. 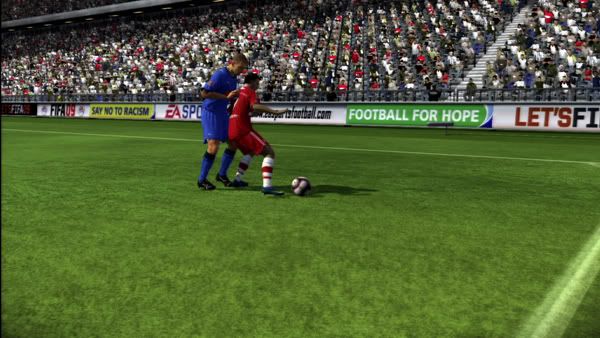 Ribery is holding off his defender down in the corner of the field. 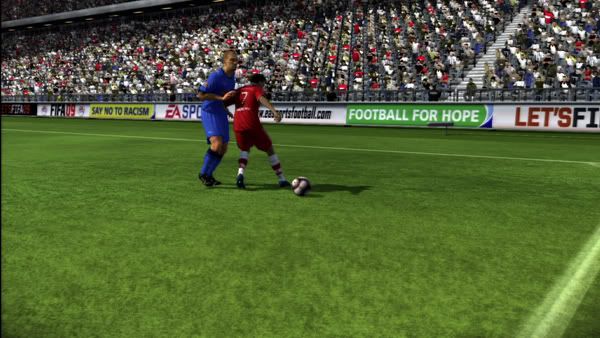 We use a quick fake to make the defender think we are cutting towards the sideline. 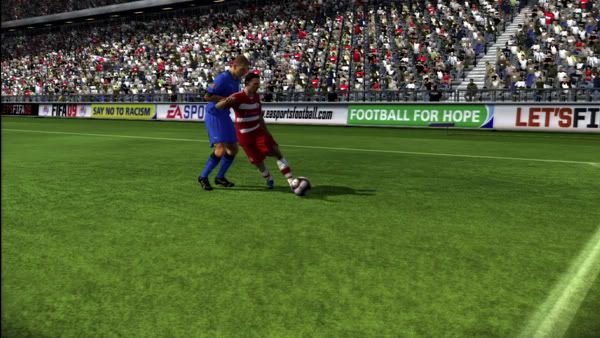 We then release the R2/RT button and push the Left Thumbstick towards the goal to spin out of the Shield position. 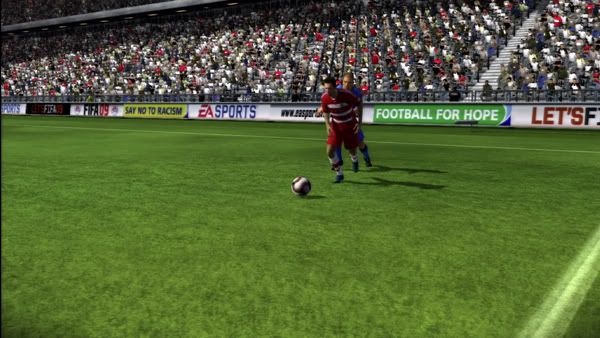 Our defender is behind the play and we are on our way to the net. Stepover to Flip Flap This quick combination move needs lots of space to pull off. Life the other moves in the section, if can effectively beat defenders and create space for your player to attack the goal. 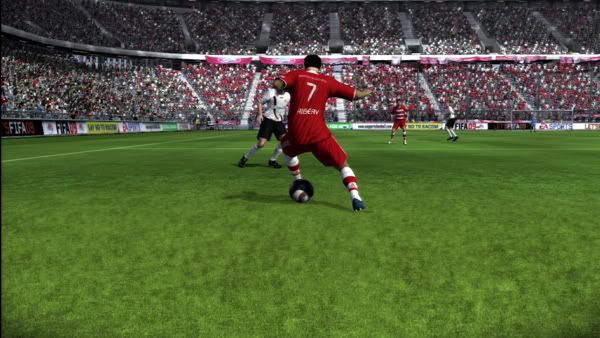 We start the Stepover move to the left as the defender moves in. 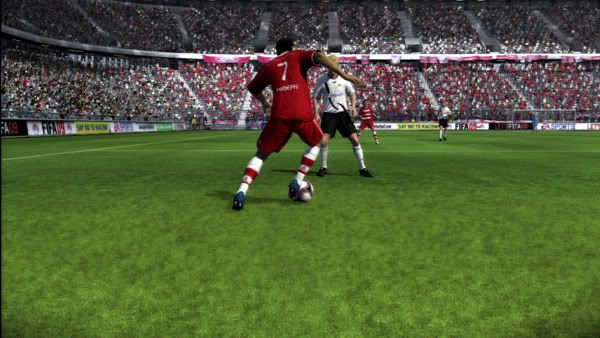 We exit the Stepover and immediately transition into an Elastico. 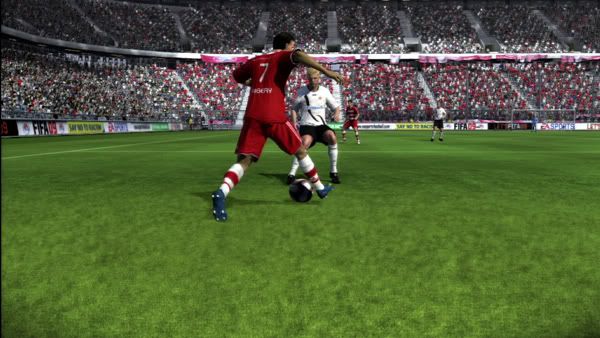 The move finishes with a hard cut move across the face of the defender and to the left. 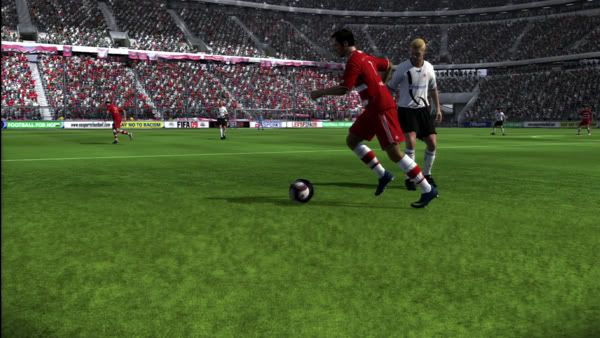 Ribery beats the defender and takes off down the field. Stepover to McGeady Spin This final combination is one of our personal favourites. You dont need as much space as the Stepover Flip Flap since you will be pulling the ball away from your opponent. The nice aspect of the McGeady exit is that it creates lots of space from your defender. If you hit the timing right, youll have plenty of room to make your next move. 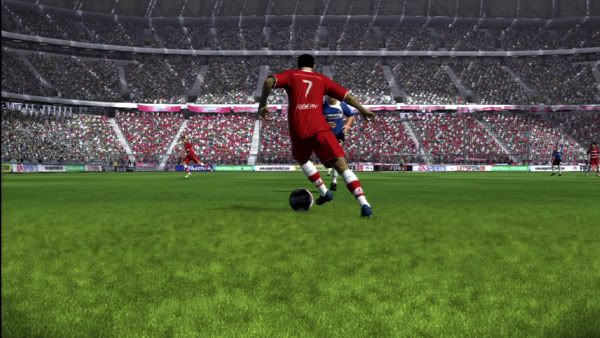 Ribery begins the Stepover move to the left side, hoping to get the defender to commit in that direction. 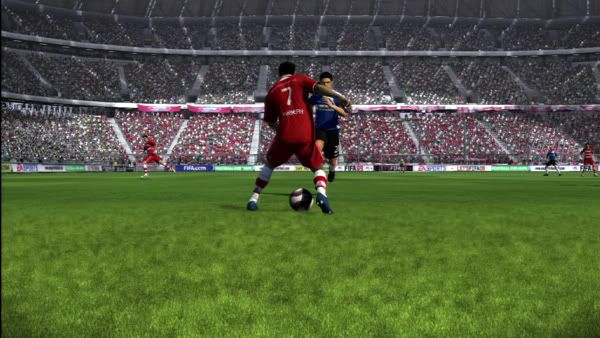 We complete the Stepover, but the defender keeps coming straight in. With other exits here, the ball would be stolen. 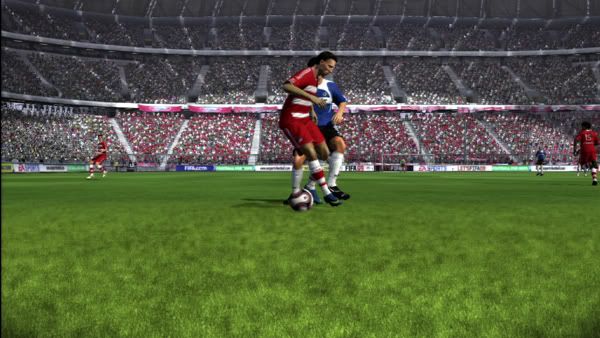 The McGeady Spin shields the ball as Ribery begins to spin out to the side. 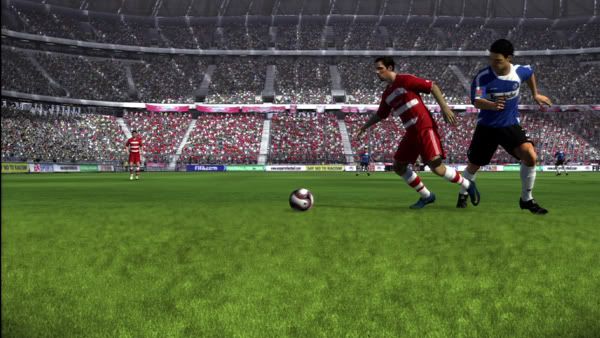 Ribery skips free of his marker and can hit his next target down the field. Final Thoughts This series of moves only scratches the surface of what you can do in Fifa 09. Each day that we play, we find a new combination that works. Master the moves in Arena mode and then take them onto the pitch and dazzle the fans while you wreak havoc on defenders
__________________
Note to Tiburon Marketing: A great product sells itself, no "back of the box" features required! (See Fifa...) |
|
|
|
|
#19 | ||||||||||||||||||||||||||||||||||||
|
Semi-retired
|
Re: Official players guide for Fifa09 from EA Sports. *updated* 56k warning...
Combos and Exits
We’ve taken a look at all of the Basic and Advanced Skill moves in Fifa 09. Now it is time to put these together to create some devastating dribbling combos. Some of these combos require players with a higher level of skill. It is a good idea to take players from your favourite team into Arena mode and put them through their paces. This way you will know which moves your players can perform.Players like Ronaldinho and Franck Ribery can perform all of combos and exits in this section of the guide. Less skilled players will perform simpler variations of some of the skills, or will be unable to perform them at all.These instructions assume that you are facing forward (like in the Arena) and that you have held down the Skill modifier button (L2 on PS3 or LT on Xbox 360). How to Execute
We have included a picture sequence of each Combo/Exit below so you will be able to see what they should look like when executed properly. Ball Roll to Cruyff Dribble 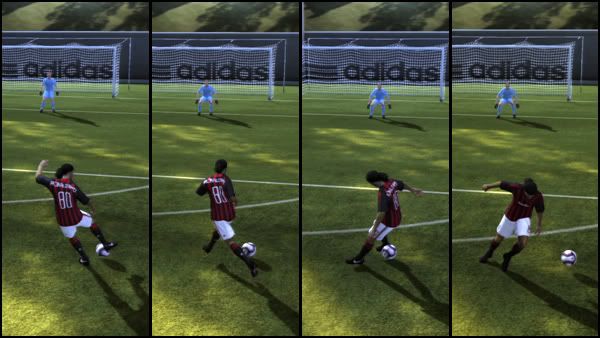 Ball Roll to Triple Flip Flap 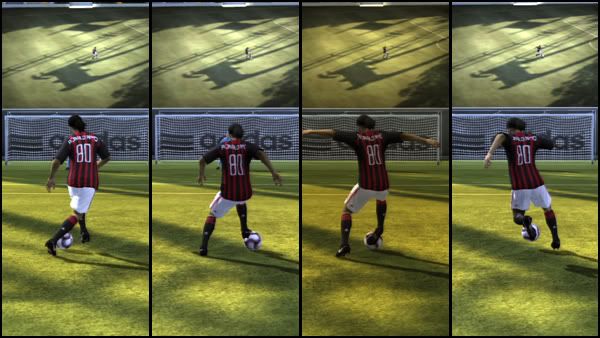 Ball Roll to Hocus Pocus 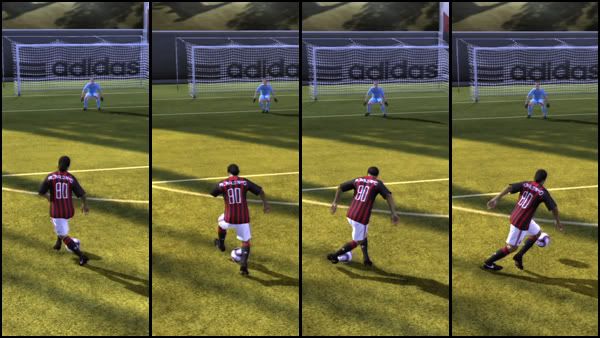 Body Feint Pull Across 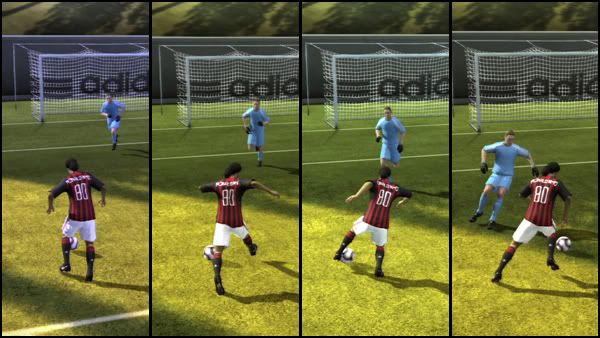 Double Stepover 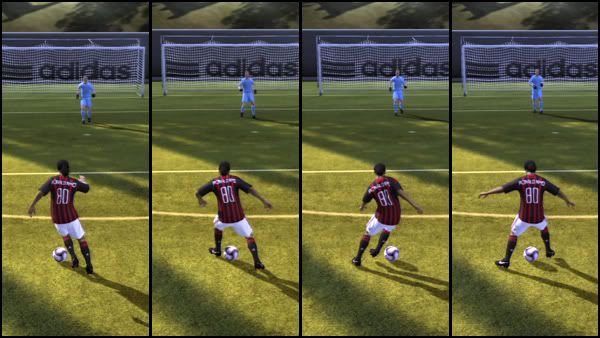 Drag Behind the Standing Leg 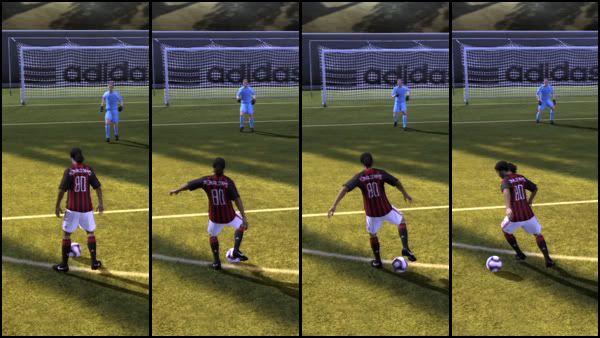 Fake Shot to Drag & Go 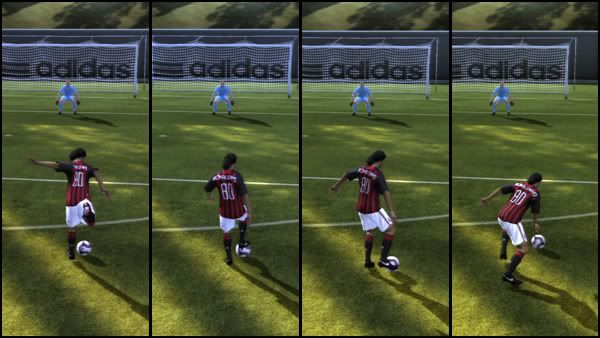 Fake Shot to Heel to Heel 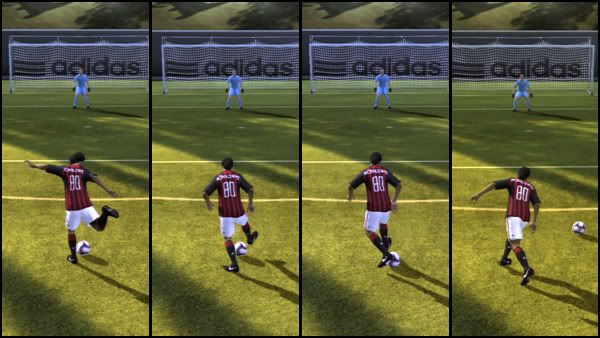 Fake Shot to Flip Flap 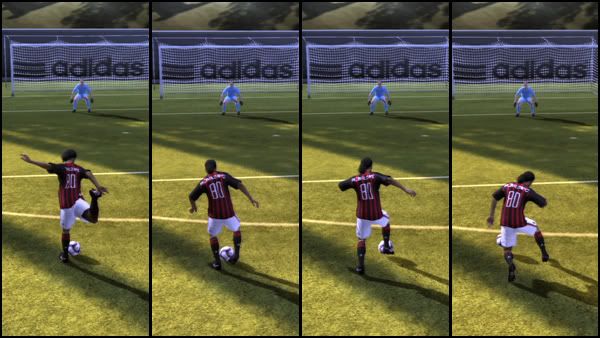 Fake Shot to McGeady Spin 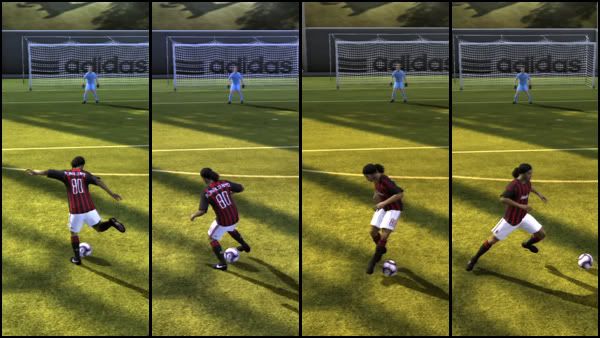 Jay Jay Okocha Skill 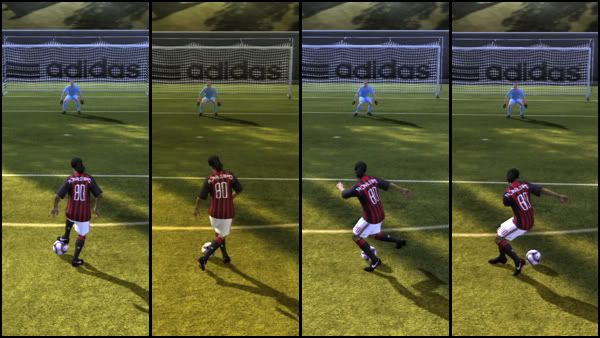 Multiple Ball Rolls 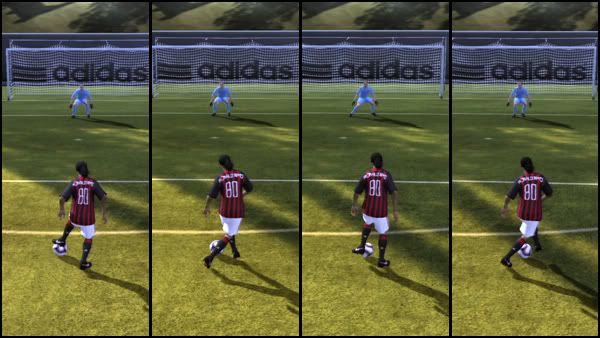 Reverse Stepover Drag Through 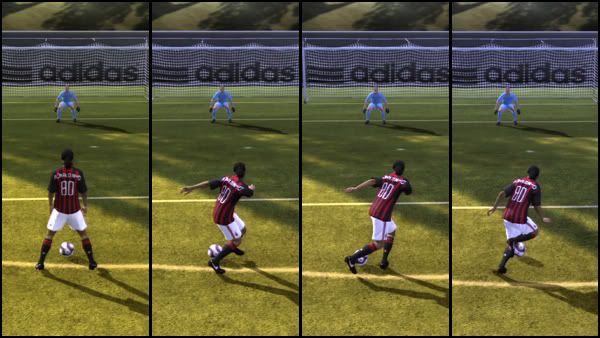 Reverse Stepover to Spin Exit 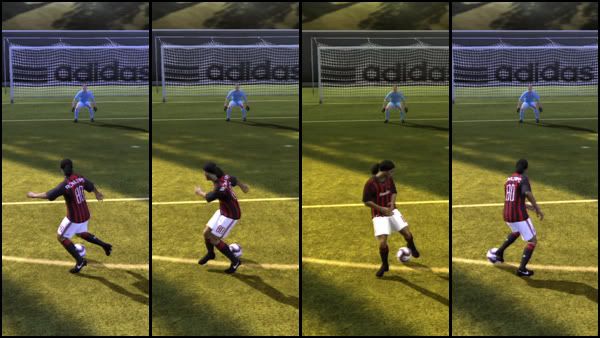 Reverse Stepover to McGeady Spin 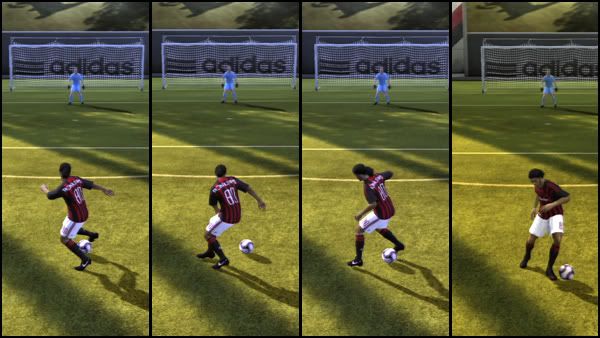 Stepover Left to Hocus Pocus 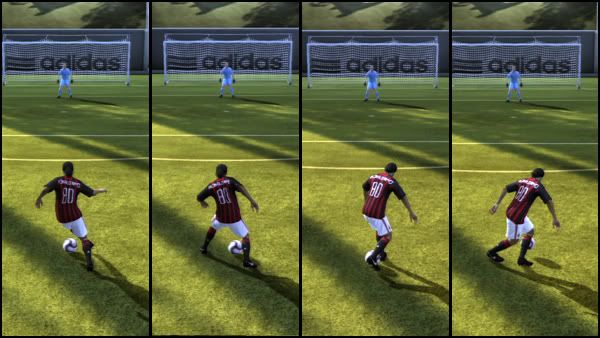 Stepover to Matthews 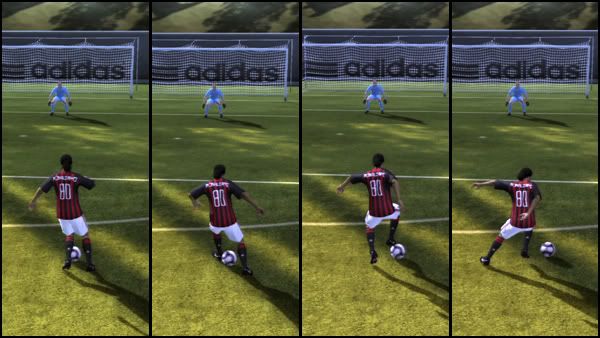 Final Thoughts There are tons of Exit and Combo moves available in Fifa 09. Spend some time in the Arena experimenting on your own and see what else you can come up with.
__________________
Note to Tiburon Marketing: A great product sells itself, no "back of the box" features required! (See Fifa...) Last edited by BrianFifaFan; 09-25-2008 at 03:44 PM. |
||||||||||||||||||||||||||||||||||||
|
|
|
|
#20 |
|
Semi-retired
|
Re: Official players guide for Fifa09 from EA Sports. *updated* 56k warning...
Juggling
Unless you are beating your opponent very badly and just want to rub it in his face a bit, you won’t have too many opportunities to juggle in game. However, juggling is a fun way to pass the time in Arena mode as there are numerous tricks that you have at your disposal. These instructions assume that you are facing forward (like in the Arena) and that you have held down the Skill modifier button (L2 on PS3 or LT on Xbox 360). 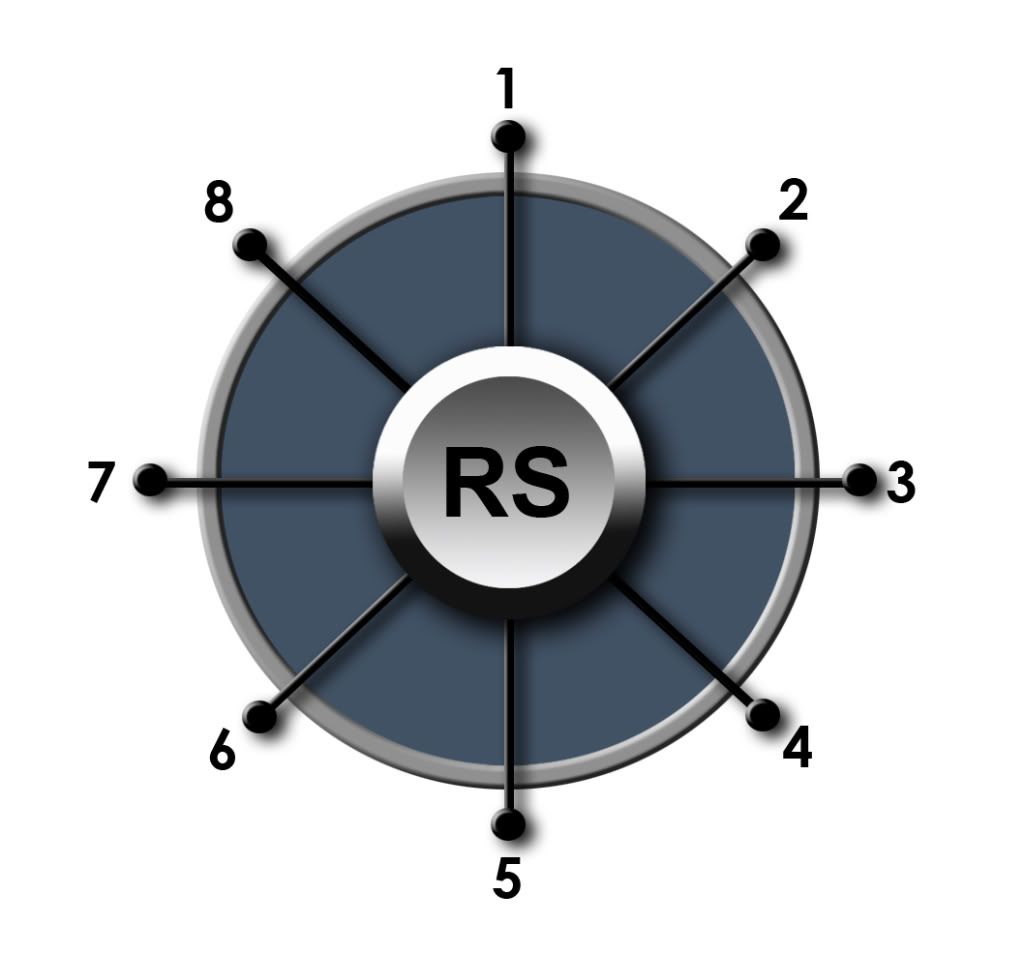 How to Execute Move How to Execute Flick Up Tap R1/RB – Less Skilled Players Ronaldinho Flick Up Tap R1/RB – Advanced Players Laces Flip Up Hold R1/RB – Advanced Players Juggling/Kick Ups Tap R1/RB repeatedly Sombrero Stall Flick Back Hold Left Thumbstick back while juggling – Advanced Players Sombrero Flick Back Hold Left Thumbstick back while juggling – Less Skilled Players Around the World Back to Left to Forward to Right (5,6,7,8,1,2,3) – Advanced Players Around the World Alternate Back to Right to Forward to Left (5,4,3,2,1,8,7) – Advanced Players AkKa/In Air Flip Flap Flick Right, Left (3,7) – Advanced Players Sombrero Flick Left Hold Left Thumbstick left while juggling Sombrero Flick Right Hold Left Thumbstick right while juggling Knock it High for Bicycle Hold Left Thumbstick forward while juggling Chest Flick Hold L3 and Triple Tap R3 – Advanced Players Hop the World Trick – Right Foot Hold L3, Right Thumbstick Back to Right to Forward to Left (L3,5,4,3,2,1,8,7) – Advanced Players Hop the World Trick – Left Foot Hold L3, Right Thumbstick Back to Left to Forward to Right (L3, 5,6,7,8,1,2,3) – Advanced Players We have included a picture sequence of each Juggling Skill below so you will be able to see what they should look like when executed properly. Ronaldinho Flick Up 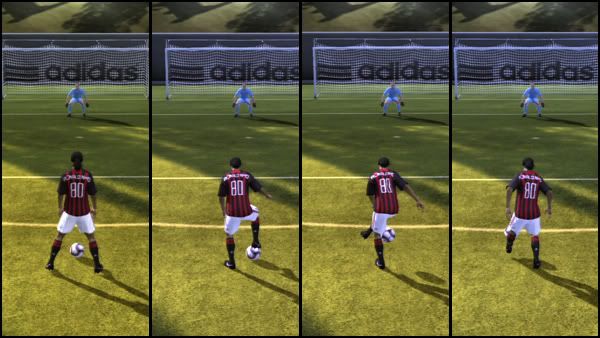 Laces Flick Up 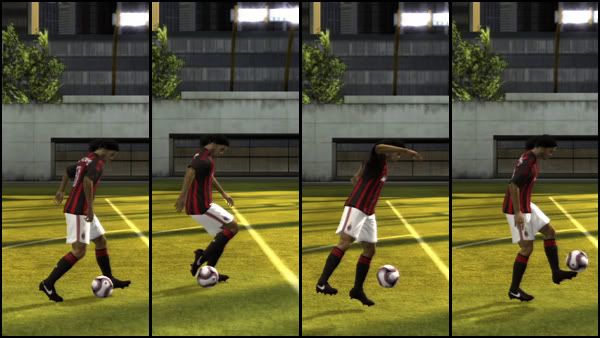 Sombrero Stall Flick Back 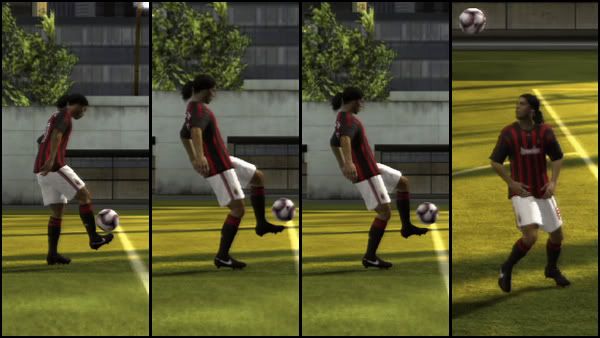 Around the World 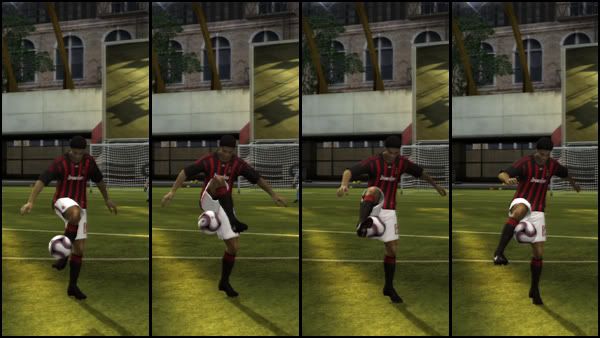 Around the World Alternate 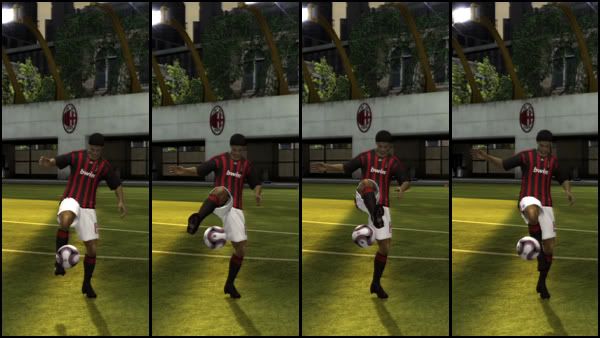 Akka/In Air Flip Flap 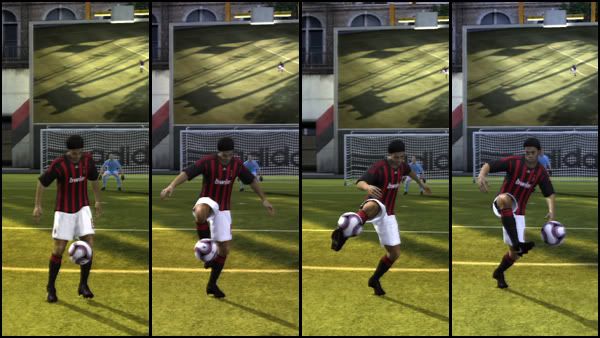 Sombrero Flick Left/Right 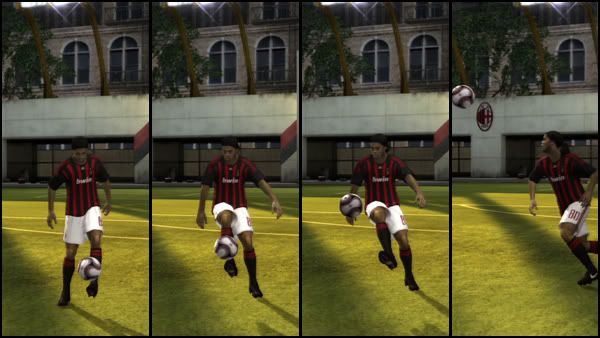 Knock it High for Bicycle 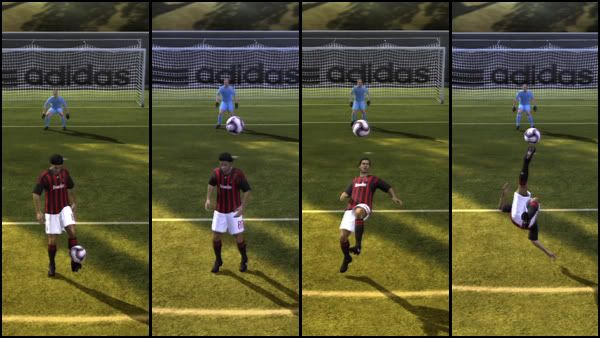 Chest Flick 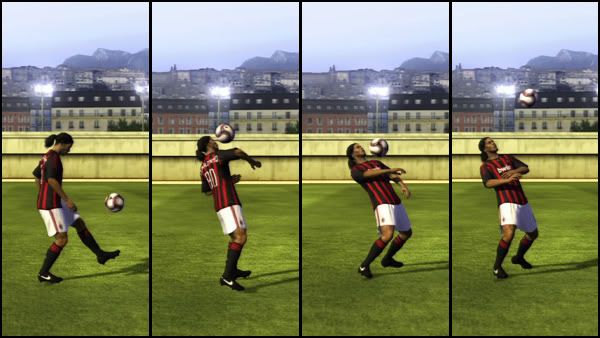 Hop the World 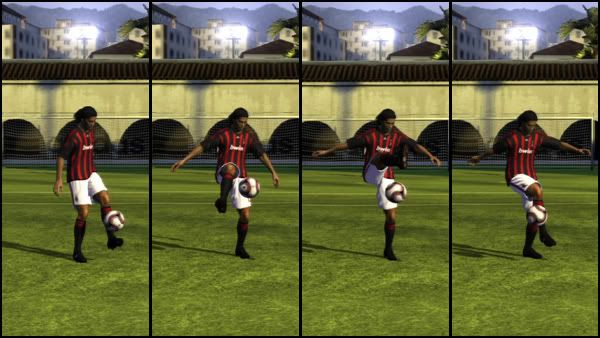 Final Thoughts While the Juggling moves are not typically useful in game situations, they can be a good way to improve your timing and stick skills in the game.
__________________
Note to Tiburon Marketing: A great product sells itself, no "back of the box" features required! (See Fifa...) Last edited by BrianFifaFan; 09-25-2008 at 01:49 PM. |
|
|
|
|
#21 |
|
Semi-retired
|
Re: Official players guide for Fifa09 from EA Sports. *updated* 56k warning...
Tactics
Tactics are performed down using the D-pad. These are simple strategies that can make quick changes to the way your team plays.. You can use this strategy to override some game defaults based on what you notice in the game to really assist your team in being successful either on the attack or in defending. There are six basic tactics that are listed below. CB Attack Press up on the D-pad to trigger your CB to join in with your next attack. If you find the opposing defence constantly has you outnumbered, this is a simple way to add another attacker without actually changing your formation. Your opponent may not be expecting another attacker, so oftentimes this can give you an advantage. (Image CB Attack.jpg) 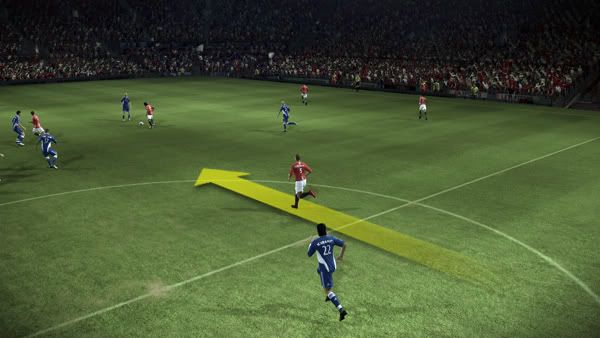 Opposing Wing Attack Press left on the D -pad to trigger a player on the opposite side of the pitch to move forward to join the attack. Like the CB attack, this is a great way to increase your attacking numbers and make your team a little tougher to defend. You can use this to make him a target for a big switch or a cross. Even if you dont switch the ball, he can pull defender out so that another player can exploit the vacated space. (Image Opposing Wing Attack.jpg) 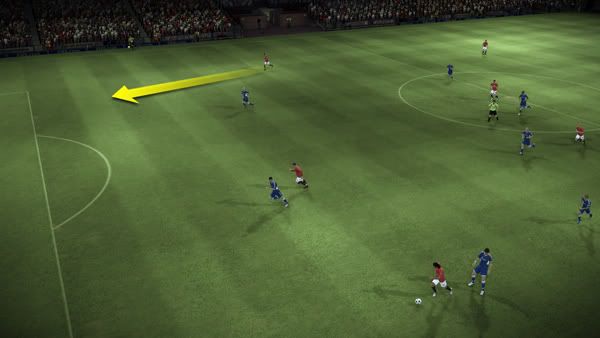 Offside Trap Press down on the D-pad to trigger your defensive line to pull up towards midfield to try and catch a possible opposing target player offside. Look for the forwards making high runs and use this to keep those cherry pickers honest. Once they are caught, they are more conservative next time. Timing is crucial as you do not want to give your opponent a breakaway, either. (Image Offside Trap.jpg) 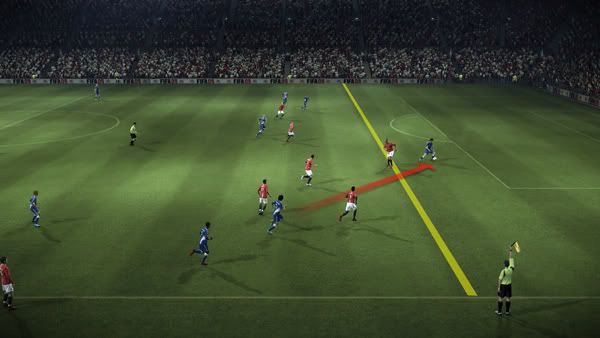 Team Press Press right on the D pad to give your team a stronger pressing mentality. This will make your team push for the ball harder to win it back and make them much more physical. This is a good idea if time is running out and the other team is in possession mode, killing the clock. (Image Team Press.jpg) 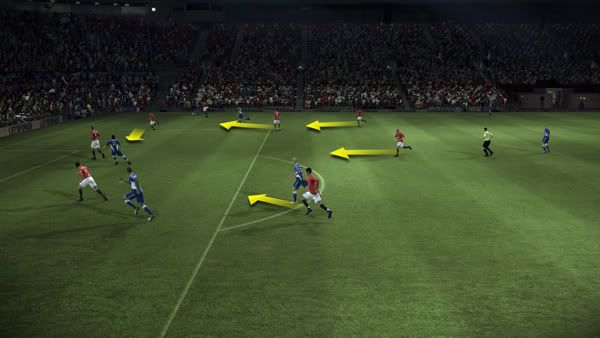 Decrease Mentality No, this does not mean you remove intelligence from your players! By pressing left on the D -pad, it does, however, decrease your teams attacking mentality and put them into a more defensive posture. This is best used to hold onto a lead against a very tough team late in the game. Increase Mentality Pressing right on the D-pad increases your teams attacking mentality causes them to press to create turnovers and scoring attempts. Again this is usually used late in the game to try and get a much needed goal. More players will go forward into the attack. On the Ultra Offensive setting, pretty much everybody by the keeper and centerbacks will go forward.
__________________
Note to Tiburon Marketing: A great product sells itself, no "back of the box" features required! (See Fifa...) |
|
|
| Advertisements - Register to remove | ||
|
|
|
|
#22 |
|
Semi-retired
|
Re: Official players guide for Fifa09 from EA Sports. *updated* 56k warning...
Quick Tactics
Quick Tactics allow you to change the way your team plays on the fly. This is different than simply adjusting your teams Mentality, or sending your Central Defenders on the attack. Quick Tactics enable you to totally change the way your team plays by switching to either a preset or custom tactic in game. You dont have to even exit out of the pause menu. Simply push up on the D-pad to get the Quick Tactics menu. 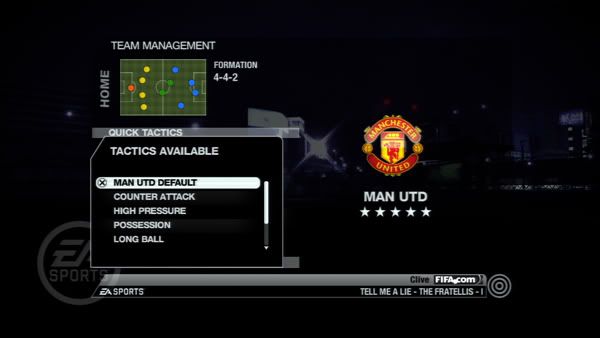 Each team has four tactical slots to choose from. You can assign any of the following tactics to those slots: · Default Team Tactic · Counter Attack · High Pressure · Possession · Long Ball · Up to 28 Custom Tactics that you have created For example, if you take the lead late in the contest and want to kill off the game, you could switch up to the Possession tactic. If your opponent is sending players forward to press you in your own penalty area, switch to the Long Ball tactic. Now you can punish him for his aggressive game plan.
__________________
Note to Tiburon Marketing: A great product sells itself, no "back of the box" features required! (See Fifa...) |
|
|
|
|
#23 |
|
Semi-retired
|
Re: Official players guide for Fifa09 from EA Sports. *updated* 56k warning...
Fifa 09 Formations (Big 4 & Divisions) (4-4-2, 4-3-3, 3-5-2, 5-3-2)
General Tip on Selecting your Teams Formation The key to success with formations is understanding what your opponent is running and countering with the correct numbers on the field. It is all a numbers game. Find ways to gain numerical superiority where you need it and you will be successful. Even strong players become vulnerable when outnumbered! Three Basic Tactical Approaches in the Big 4 1- Defensive Mentality (5-3-2) 2- Controlling the middle of the field (Balanced) (4-4-2), (4-3-3) 3- Attacking Mentality (3-5-2) There are 17 total base formations in FIFA 09. When broken down in positions and strategy, there are really four general formations (the Big 4) and all the others are basically spun out of variations of each of those. This section takes the big 4, breaks them down in detail and then explains how each variation can be adapted to a particular game situation you may face. 4-4-2 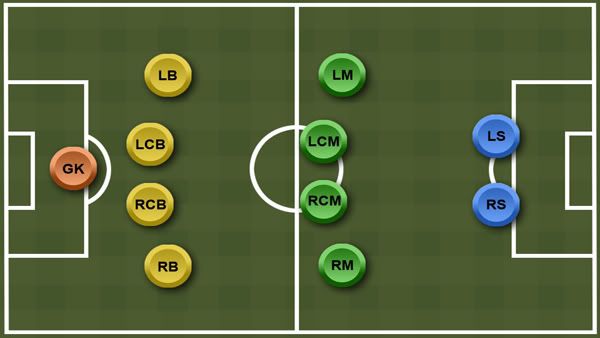 Strengths The most popular, balanced and versatile of all formations. Works well against almost any other system with built-in flexibility. Works well against a 3 player defence, since the RM and LM can act as true wing forwards then return to midfield to secure the center of the field or assist the defenders. The LS and RS work in tandem either together in the center or making opposing runs, making them tough to defend and creating more attacking opportunities. The 4-4-2 can shift into other formations on the fly, and so can easily be used to create surprise attacks. This is tough to counter attack as well, because this system is so evenly distributed across the field and provides players the most balanced distribution of workload responsibilities of any of the formations. Weaknesses If too many players get caught up in the attack from the midfield, the defenders will have to move up to cover and can cause holes in the defence that could be exploited by another 4-4-2 or a 3-5-2 system. If balance is not maintained, the opponent can quickly gain numerical superiority. Tips Use the width of the line up to work the ball around the field. Use possession and be patient for openings in your opponents. Switch the ball around the back and regroup and start the progression on the opposite side. Use numerical superiority to attack. When defending, gain numerical superiority in the middle of the field by having the LM and RM tuck in and letting the LB and RB pick up the attacking wings. The LS and RS should work in tandem to try and pull the defenders out of position. Best Formations to Counter the 4-4-2 3-5-2 with attacking mentality can outnumber the defence, 4-4-2 Variations · 4-1-2-1-2 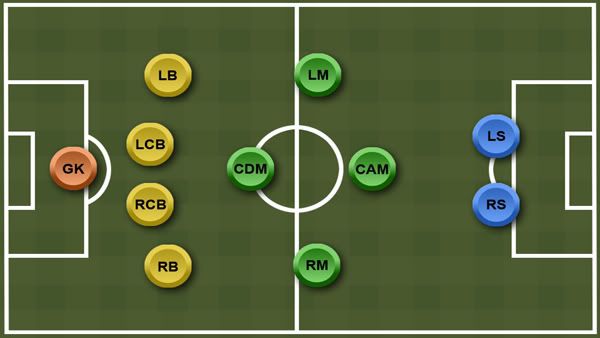 o Used by the Argentina National Team, this variation of the 4-4-2 basically takes a flat defence and shifts them to a diamond defence. The CDM becomes a holding back and assumes the stopper position. Likewise, the CAM assumes the attacking midfield role and acts as another attacker to keep the pressure on the opponents defence. · 4-2-3-1 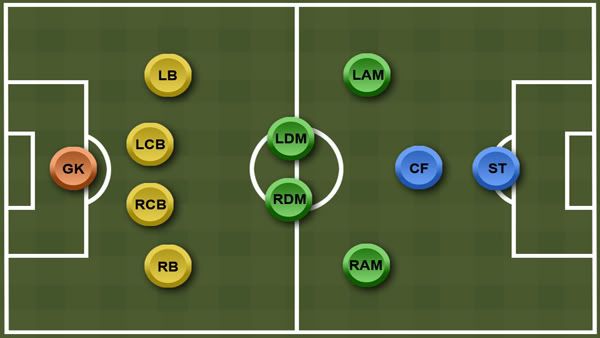 o The two central defenders become defensive oriented midfielders (LDM and RDM). The wing midfielders assume an attacking mentality (LAM and RAM). One striker now assumes the role of a CF and becomes the free roaming attacking playmaker. · 4-2-2-2 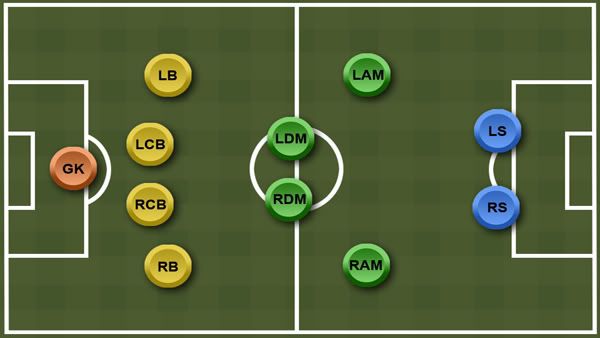 o Also known as the box midfield and made popular by the Brazil National Team, this formation lets the LAM and RAM roam more into the attack, letting the opponents attack on the wing be covered by the LB and RB. · 4-4-1-1 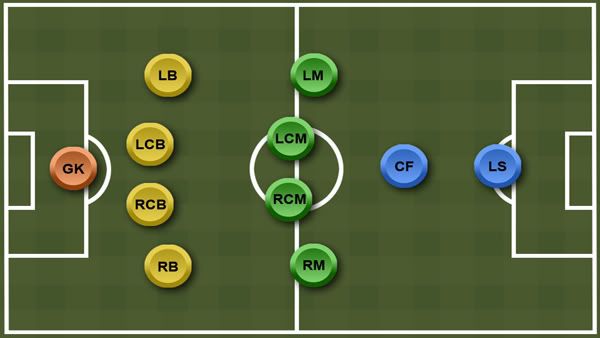 o One of the strikers pulls back, becomes a CF, and plays in the hole between the midfielders and the remaining ST. The ST has freedom to roam and seek out weaknesses in the opponents defence. 4-3-3 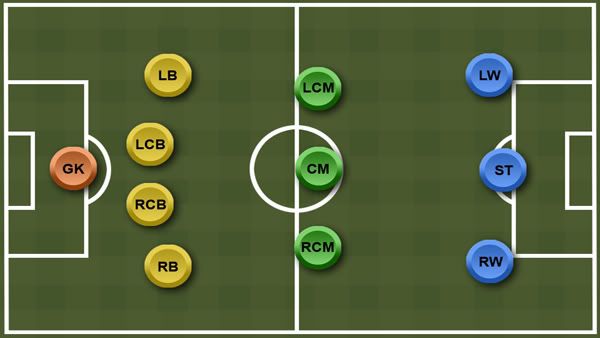 Strengths The beauty of this formation lies in controlling the middle of the field (or hole) where the 3 center mids play more compact and move laterally or vertically across the field almost as a single unit. The LW and RW keep the width on the attack and are largely responsible for not only attacking with width but also preventing wide threats from your opponent when turning over the ball. The other strength of this formation is the ability to have your CM take a more defensive posture (like a stopper), and your RCM and LCM more of an attacking posture bringing great balance to your defence (and at the same time more numbers for the attack). Weaknesses If the LW or RW players do not get back to mark the wings, it forces one of the forwards to drop back, thus converting it to a 4-4-2 and losing the power of the attacking strength upon regaining possession. Also, if the LW or RW do not get back when possession is lost, your opponent can attack with width and break up your CM trio, leaving holes for your opponent to build a center field possession attack. Tips If the forward wingers successfully get up and down the wings and the 3 center mids can stay compact, this formation will dominate a traditional 4-4-2. This is because the traditional 4-4-2 only leaves 2 true center mids and two wing mids, giving the 4-3-3 numerical superiority and allowing a lot of possession due to frequent 3v2 situations. The 4-3-3 is even good against the midfield dominant 3-5-2 because of the 5v5 in the middle of the field, and more importantly, the 3v3 for your opponents defence. If you can spring one more attacker of the three CM, you have you now have a distinct 4v3 advantage, which Chelsea runs successfully for the Barclays Premiere League. Best Formations to Counter the 4-3-3 The 3-5-2 can be used as mentioned above to force the 4-3-3 to have to shift to a 4-4-2 and lose attacking strength. The 3-4-1-2, the 3-4-2-1, and the 5-4-1 all provide a threat to unbalance the center 3 CM trio of the 4-3-3. Variations · 4-3-1-2 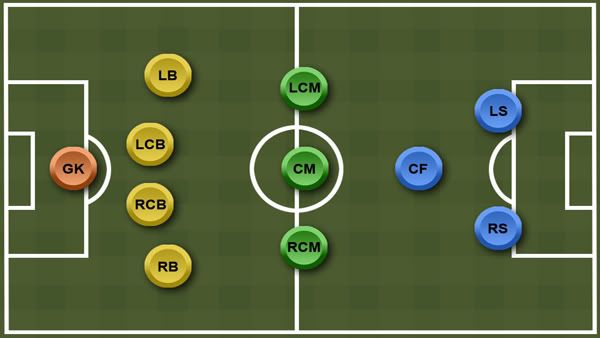 o This formation is usually deployed if the opponent has the three forwards of the 4-3-3 marked very well on attacks. This variation of the 4-3-3 takes one of the forward wingers and makes him a second true striker. At the same time, the other winger falls into a supporting role of the crafty playmaking center forward (CF). Playing just behind the strikers, the CF can wreak havoc for the oppositions defence by his constant movement and ability to feed a striker quickly. · 4-3-2-1 (Christmas Tree Formation) 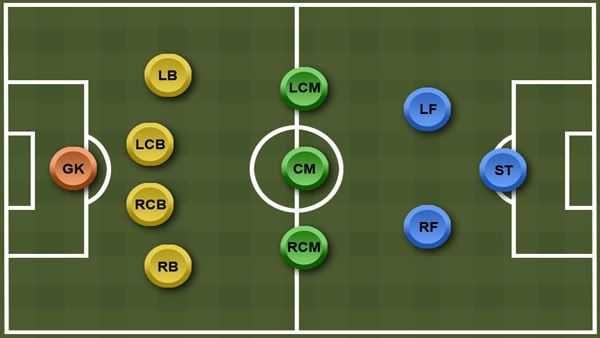 o The 4-3-2-1 gets its strength from taking the wing forwards and giving them both the same ability to be playmakers for the striker. Instead of primary responsibility to run the wings, they now play slightly behind the striker, working in tandem and opening space to allow overlapping runs from a LCM, RCM, LB or RB player. The 3 attackers (LF, RF and ST) can now move as a unit, and with the overlap of mid or defensive players, create a lot of bodies for your opponent to pick up. Through runs and overlapping runs down the middle now become a bigger weapon for you. · 4-5-1 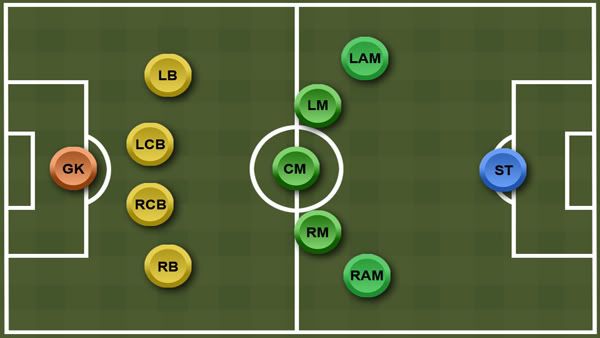 o The main purpose of shifting your 4-3-3 to this formation is to keep a strong team from scoring. It is very simple to switch to this more defensive-oriented formation by simply taking your LW and RW attackers and pulling them back into attacking midfield players (LAM and RAM). Their primary role is to support the attack, but more importantly to bring numerical balance back to the middle of the field to prevent great possession teams from possessing you on counter attacks. Brazil, Club America, and other possession-oriented teams are very good at breaking down a traditional 4-3-3 since the wing forwards tend to stay too high in the attack. 3-5-2 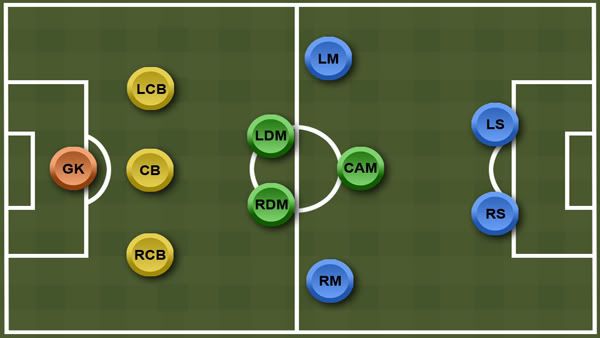 Strengths This formation utilizes a true sweeper CB (the clean up man) and two wing defenders (LCB & RCB) who usually man mark. The true strength of this formation comes from the stacked midfield which usually gives them numerical superiority in the middle of the field. The LDM & RDM alternate, acting as a stopper (or holding mid). At the same time, when being attacked the LM & RM can drop back to cover the defensive wings, shifting from a 3-5-2 to a 5-3-2 easily. The sweeper will determine how high the defensive line is kept to force the offside trap. The main difference between a 3 back system as opposed to a 4 back system is the 3 backs need to stay more compact and work as a unit, not trying to cover the entire width of the field. If one of the wing backs does push wide to cover, then one of the defensive mids must slide back to fill the gap. This formation works really well if your opponent is running a line up with a 1 or 2 man striker system. This system also has great strength when attacking to trigger numerical superiority by using 3 midfielders and 2 strikers (usually against 4 defenders). Weaknesses Take great care in noticing your opponents line up when using this system, as it can be weak against a team running 3 forwards of any type. Also, the midfield must be able to support the attack and return to support the defence. As mentioned above, the most vulnerable aspect of this line up is if your opponent can force the 3 backs to have to cover the width of the field without midfield support (say, from a quick counter attack), which creates holes for strikers to get clean looks at your goal or make threatening through runs. Tips Be very aware of the positioning of your defensive midfielders to act as a stopper, almost making a diamond defence, and act as that first line of attack to disrupt your opponents flow. Also, use your midfield strength to your advantage in both attack and defence. Look at your LDM, RDM, and CAM as a triangle in the middle of the field. If the LDM and RDM are next to each other with the CAM in front, this has the midfield triangle in a defensive posture used against a threatening attacking team and in essence gives you two stoppers. Likewise, if one defensive mid acts as a holding back (or stopper) and the other defensive mid pushes up next to the CAM, then this deploys an attacking posture used to pressure the opponents defence or capitalize with numerical superiority. Best Formations to Counter the 3-5-2 Any formation deploying 3 regular attackers keeps the constant threat of a counter attack from allowing the defensive mids from moving up in the attack too far. Also, a 3-5-2 can be very effective for all the reasons mentioned above. Variations · 3-4-1-2 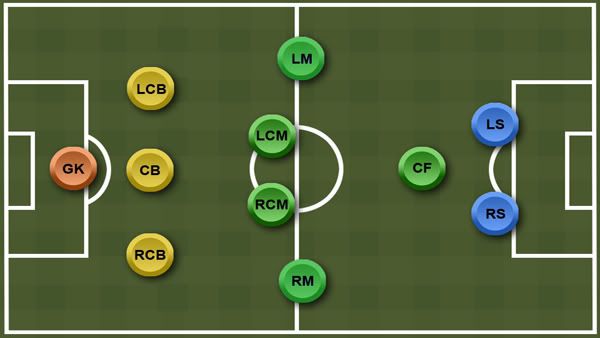 o This version of the 3-5-2 basically takes the CAM and turns him into a true playmaker--the crafty CF. So his posture is now to pressure the opponents defence as the third attacker, making creative runs and maintaining an attacking mentality. · 3-4-2-1 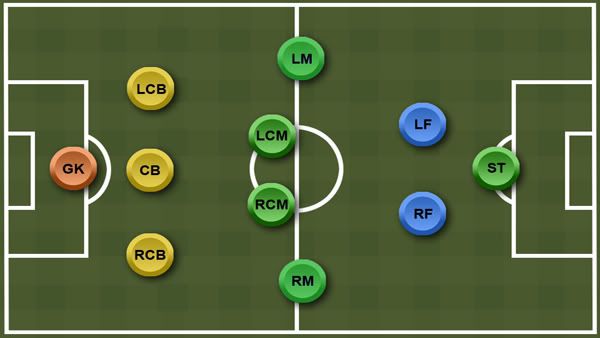 o This version takes one of the two Strikers and makes him into a more supporting forward role. Likewise, the CAM also becomes his counterpart, occupying the opposite forward role, both behind the pressing attacking line of the single striker. There is now one true striker target left to push high; however, there is great flexibility to attack with forwards who can either pinch closer together or spread wide and keep the ball in your opponents danger zone. Look for opportunities to send one of your forwards on a through run, even ahead of the striker for a quick goal scoring opportunity. · 3-4-3 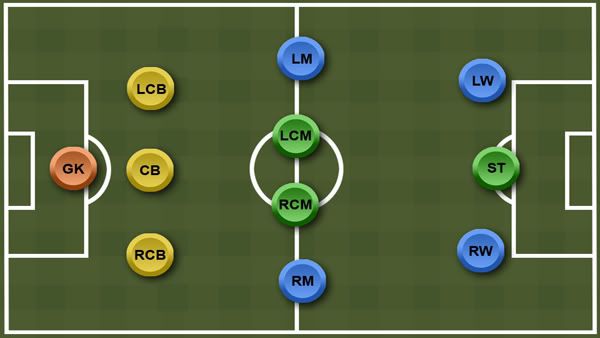 o This version takes one of the two Strikers and makes him into a true winger. Likewise, the CAM also becomes his counterpart, occupying the opposite forward winger role. There is now one true striker target left, but great flexibility to attack wide. This creates all sorts of aerial threatening crosses to pull the defenders out of position, creating holes for your striker to slash through and bury the ball in the old onion bag. 5-3-2 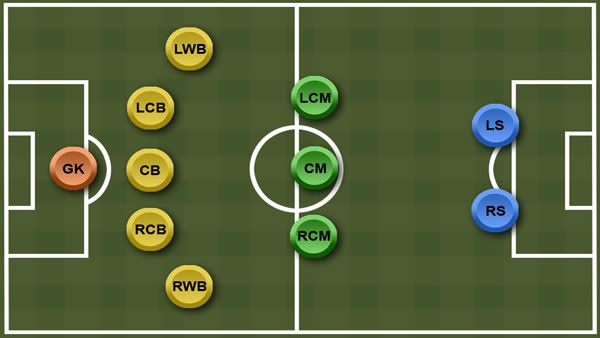 Strengths Simply put, if you are against a serious threat of attack constantly in the game or are trying to hold onto a lead in the closing moments of a white knuckle game, then this system shores up and basically puts your team into a strong defensive posture. Once again, there are an odd number of true defenders, which means that the center player is usually the sweeper, or the clean up man. The LWB and RWB are great at running up the wings and provide additional numbers into the attack. Roberto Carlos for Brazil and Real Madrid was a master at creating the odd man attacking threat from the wing. He would come up from so far back so fast that mids and defenders alike were often caught off guard, instantly giving his team numerical superiority and creating a lot of goal scoring opportunities. The 3 center defenders stay compact and make it tough for your opponent to get through runs. The center mids likewise have great flexibility to play compact and move as a unit which can dominate the middle of the field. Weaknesses The ability to keep the ball in your opponents third of the field is tough against certain line ups, like the 4-4-2, where your players need to be creative to penetrate successfully. Also, if the 3 center mids start to spread wide to play the width of the field, it does leave holes for teams with strong midfield numbers (like the 3-5-2) to take over the middle of the field and exploit any holes on your defence. You may find yourself always under attack and seemingly starved for possession of the ball. Your opponent will look for opportunities to attack quickly when the wing defender is in their third of the field. Tips Most importantly, make sure that only one wing back at a time makes that long run into the attack so that the other can hold, leaving 4 remaining in the back so that you are not vulnerable to a quick counter attack. If you commit too many players into the attack, then the strength of this formation starts to break down quickly. Have your center mids jockey more when on the attack to try and stop the threat of attack down the middle of the field, and force your opponent to play wide into where your defensive strength is strategically waiting. This line up is just like the 3-5-2, with the exception that the LM and RM have defensive priority. Best Formations to Counter the 5-3-2 The 3-5-2, based on numbers controlling the middle of the field, as well as the balance from a 4-4-2 can be very good at keeping the heat on your defence and out possessing you. Variations · 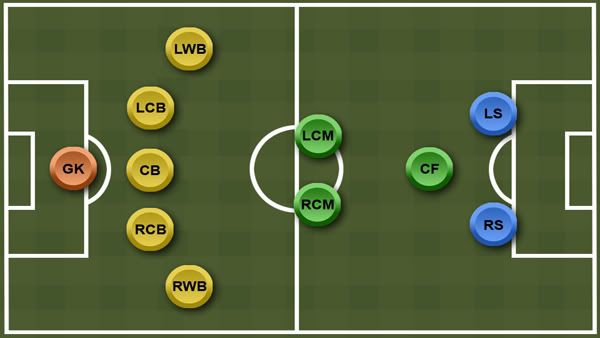 o This variation takes the center midfield player and turns him into a better playmaker for the striker as a CF. This gives more flexibility to roam across the width of the field and leaves the 2 remaining center mids with more of a supporting role. · 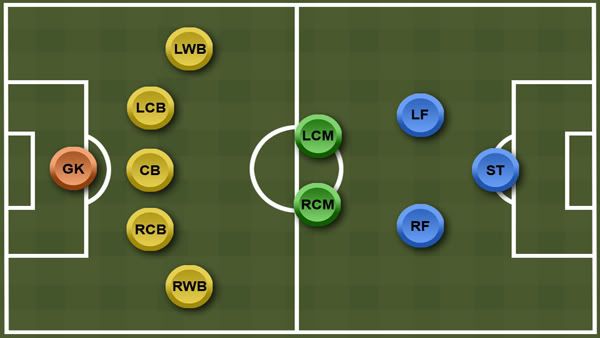 o This is another version of the Brazilian box midfield. It takes one of the strikers and puts him into more of an attacking supporting role as a true forward. It also takes the CM and makes him into his counterpart as the other forward. The two play in tandem behind the striker, but do have great flexibility to make or serve through runs or launch in crosses. · 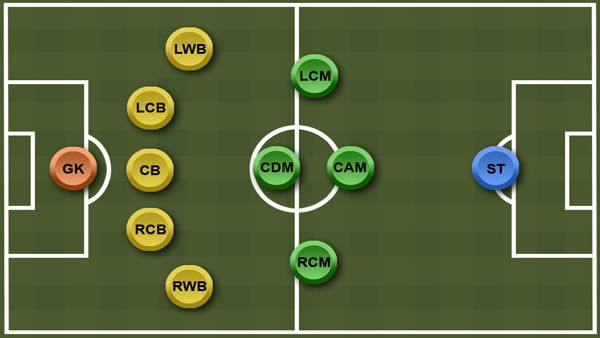 o This variation is deployed to create a true diamond midfield. One striker becomes a center attacking mid (CAM) and one CM becomes a center defensive mid (CDM) playing right above the defensive line much like a stopper. This leaves two wing mids (LM & RM) and one true striker. The CAM is strongest and goes to a checking back striker. The is best to run when your CB can drop a step back to take on the sweeper role and allow your RCB and LCB to work as central defensive pair. RM and LM can pinch in to the middle of the field when your LWB or RWB make attacking wing runs.
__________________
Note to Tiburon Marketing: A great product sells itself, no "back of the box" features required! (See Fifa...) |
|
|
|
|
#24 |
|
Semi-retired
|
Re: Official players guide for Fifa09 from EA Sports. *updated* 56k warning...
Editing Formations
With the introduction of Custom Tactics in FIFA 09, you can dictate your style of play without having to play much with your formation. However, for the true footballing wizard who wants to tweak every aspect of his team, learning how to edit formations is a must. When you enter into Team Management, you will have the option to edit your formation. This feature allows you to move players into new positions and change their roles on your team. You have three options for each player that you can adjust: Player Base Position, Player Work Rate, and Player Positioning. 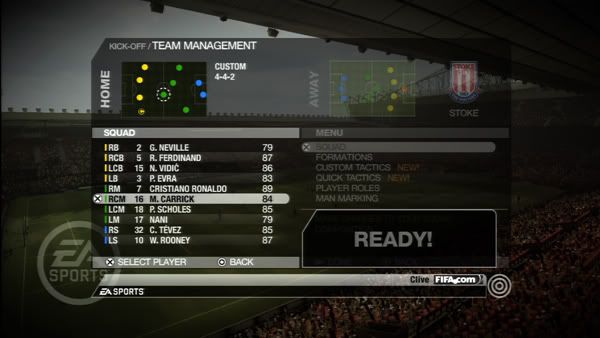 For purposes of this break down, we are going to make a couple of adjustments to Manchester Uniteds trademark 4-4-2. Lets start things off with Carrick. We select him and then move his icon further back and into the center of the pitch. 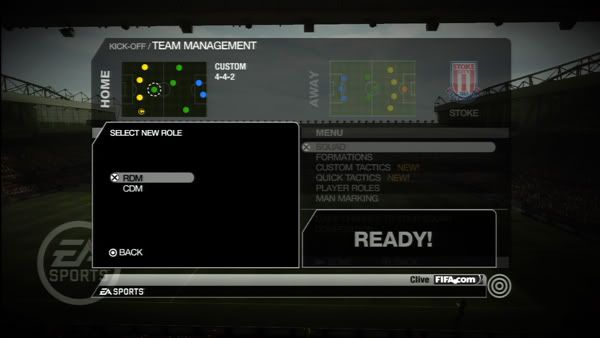 Since we have moved him into a new position, his role is going to change as well. We can choose to make him a Right Defensive Midfielder or a Center Defensive Midfielder based on his new location on the pitch. 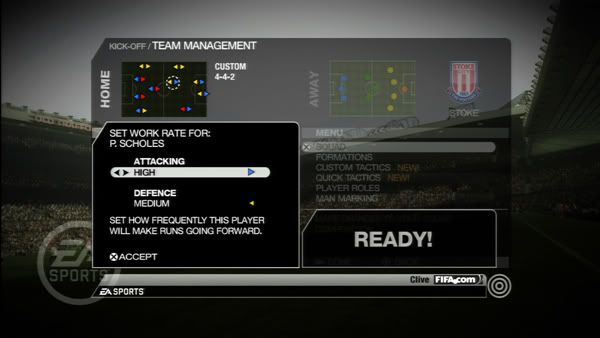 Next, we click on Paul Scholes and choose to adjust his Work Rate. We are going to ramp up his attacking rate and decrease his defending rate. We want him to surge into the attack at the expense of his defensive responsibilities. We have Carrick in the hole now to cover things. Attacking Work Rate influences how often the player considers making forward runs. Defensive Work Rate affects the amount of importance the player places on getting back to defence. Cristiano Ronaldo, for example, has a low defensive work rate, as his primary focus is to attack. A Defensive Midfielder, however, will have a high defensive work rate and a low offensive one. Be careful of giving a player both a high attacking and high defensive work rate as they will fatigue very quickly. 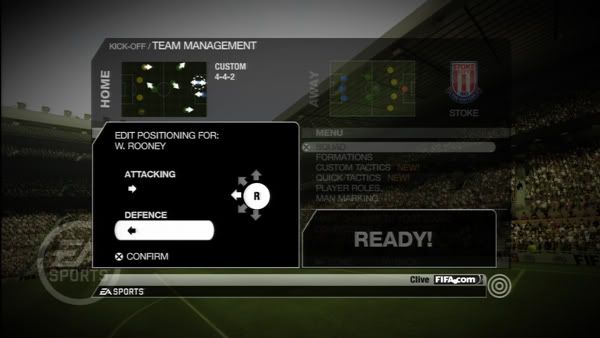 We are going to make one final adjustment to our team. We take Wayne Rooney and give him a defensive position adjustment backward. We want him to drop a bit more when the other team has the ball so that he can lead the charge back down the field. Many FIFA gamers confuse this positional adjustment with runs. These are not runs. They merely instruct the player to favour adjusting his position in a direction when the team is either on offense or defence. Be careful when moving this around too much as you will create holes in your squad. You can also use these adjustments to help cover the field when defenders go forward. Patrice Evra will make overlapping runs and his positional adjustment on the attack is to move forward. Carrick has a positional adjustment to shade back towards Evras position, so he can pick up the counter attack. When you match up different Formations, Player Positioning, Work Rates, and Custom Tactics, you have a game that is ever-changing and never runs out of replay value.
__________________
Note to Tiburon Marketing: A great product sells itself, no "back of the box" features required! (See Fifa...) |
|
|
 |
«
Previous Thread
|
Next Thread
»
«
Operation Sports Forums
> Soccer
> EA Sports FC and FIFA
> EA Sports FIFA Last Gen
»
|
|
All times are GMT -4. The time now is 12:04 PM.
|
Top -
|


